Picture perfect: Transferring images to your computer

With the advent of the digital camera, it's a snap to add original pictures to documents, or to send them through e-mail. Windows Me makes it even easier to work with your pictures. It uses a technology called Windows Image Acquisition (WIA), which enables different devices, such as digital cameras and scanners, to communicate with Windows Me.
Note To take advantage of the WIA features in Windows Me, your camera must be WIA-compliant. Windows Me offers some advances to all digital photographers, but this article is written specifically for users of WIA-compatible cameras.
Plug and Play
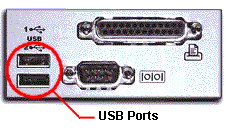
First, you need to transfer your digital photographs from your camera to your computer. Windows Me features the most complete support of any operating system for the computer industry's Plug and Play standards, including Universal Serial Bus (USB)—so if your camera uses a USB connection, getting it recognized by your computer is simply a matter of plugging it in. You can even plug in your USB connector while your computer is still running. Check your camera's instructions to see what type of connection it uses.


When you plug your WIA camera into your USB port, the Scanner and Camera Wizard opens and displays thumbnails (small pictures) of the photos on your camera. From this window, you can easily select pictures, view them, and rotate them on your camera before downloading them to your computer. The wizard helps transfer the pictures to your hard disk, organize storage folders by date, title your folders, delete pictures from the camera, and will even display picture properties (such as the file name, size, and type) and the date the picture was taken.
Me and My Pictures
After you transfer pictures from your camera, they’ll be displayed as thumbnail graphics in the My Pictures folder (or the subfolder that you have specified). Select a thumbnail to view a picture at a larger size in the preview pane, and then use the icons (shown below) to rotate the image or to change your view. You can also choose to view the images in a full-size slide show.
 |
Zoom In. Select this button, and then click a spot in the picture to view that area closer. Clicking repeatedly enlarges the view. |
 |
Zoom Out. Select this button and then click on a spot in a picture to zoom out. Clicking repeatedly will zoom out until the entire picture fills the pane. |
 |
Image Preview. Click this button to view the picture in a larger window. A new window opens, with two additional buttons:
 |
Actual Size. Click this button to see your picture at its real dimensions (you may need to resize the window to see all of it). |
 |
Best Fit. When you click this button, Windows Me resizes your image so that it fits inside the Image Preview window. |
|
 |
Print. Click this button to print your picture. |
 |
Rotate the picture. Use this button to rotate a picture. Click, and then select the direction in which you want the picture to turn. This is a great way to fix a photo that inadvertently turned out sideways. |
The next step
Once your chosen photographs are safely saved on your computer, you can add them to documents and Web pages, or send them in e-mail automatically. Just right-click on a photo, point to Send To, and then click Mail Recipient. Windows Me will launch your e-mail program and add the photo as an attachment. It's fast, it’s easy, and you don't have to write "Do Not Bend" all over the envelope.
|
| |
WIA and USB
Here are some WIA-compatible cameras that use a USB connection:
- Kodak DC220
- Kodak DC260
- Kodak DC265
- Kodak DC290
- Kodak DC240
- Kodak DC280
- UMAX AstraCam
- UMAX AstraCam 1000
Learn More
Add photographs to documents directly from your camera.
|
|
|
|
