To Start a Paragraph
To Enter a List
To Enter a Lablist
To Enter a Lablist with Headings
To Provide Subheadings within a Topic
To Show a Computer Listing
To Add a Note, Caution, or Warning


Each topic you write should have an element (or tag) that marks the start of the topic:
<element id=id>  Help Topic's Title
The body of the topic
Where
element
is one of the following: chapter,
s1,
s2,
...,
s9
. The body of the topic may begin on any line after the title. The topic's position within the topic hierarchy is determined by the element used to start the topic and by the element used to start the immediately preceding topic. For example, a topic that starts with <s2> and immediately follows a topic that starts with <s1> makes the <s2> topic a subtopic of the <s1> topic.
The id is required if the topic is to be accessed either from the application (if you are writing application help) or from a hyperlink.
The help topic title can be any string. If the title string occupies more than one line in your source file, end all but the last line with an & (ampersand). To force a line break at a particular place within the title, use a \ (backslash) character.
<s1 id=welcome>Welcome to My Application
To force the title to be displayed on two lines, you use a \(backslash) like this:
<s1 id=welcome> Welcome to \ My Application
The Application Builder provides an interactive, graphical
environment that facilitates the development of desktop
applications.

The Application Builder is designed to make it easier for developers
to construct applications that integrate well into the desktop. It
provides two basic services: assembles Motif objects into the
desired application user interface, and generates appropriate calls
to the routines that support desktop integration services.
If you want a paragraph indented from the left margin, include the optional indent parameter:
<p indent> An indented paragraph can be used to draw the reader's
attention to an idea.
The following paragraph overrides the automatic word wrap in help windows and maintains the line breaks exactly as entered in the source file. The <image>
element is especially useful for entering addresses.
<image>
Brown and Reed Financial Investors
100 Baltic Place  Suite 40 New York, New York
<\image>
- <list type spacing>
* item
* item
.
.
.
* item
<\list>
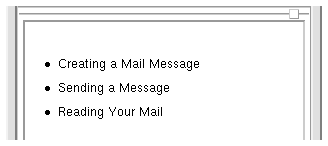
<list>
* Creating a Mail Message
* Sending a Message
* Reading Your Mail
<\list>
The online format of the preceding markup is:
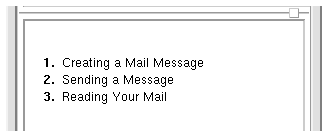
To format the same list with numbers and reduced spacing between items, use:
<list order tight>
* Creating a Mail Message
* Sending a Message
* Reading Your Mail
<\list>
The output is:
To create a labeled list without headings, use the <lablist> element as shown:
- <lablist spacing>
\ label 1\ item 1 text
\ label 2\ item 2 text
.
.
.
\ label N\ item N text
<\lablist>
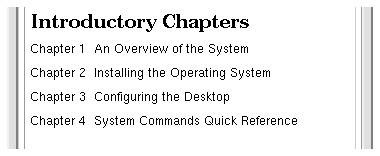
<lablist tight>
\Chapter 1\ An Overview of the System
\Chapter 2\ Installing the Operating System
\Chapter 3\ Configuring the Desktop
\Appendix A\ System Commands Quick Reference
<\lablist>
The output is:
- <lablist spacing>
- <labheads> \ heading for labels \ heading for items
- \ label 1\ item 1 text
\ label 2\ item 2 text
- .
.
.
\ label N\ item N text
<\lablist>
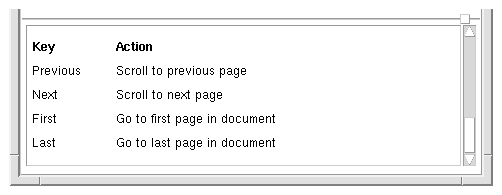
<lablist>
<labheads>\Key \Action
\Previous\ Scroll to previous page
\Next\ Scroll to next page
\First\ Go to first page in document
\Last\ Go to last page in document
<\lablist>
produces this output:
- <otherhead> Heading
- Or,
for small headings, use the following markup: - <procedure> Heading
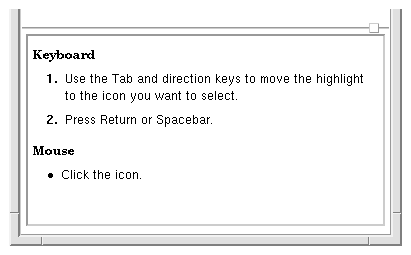
<procedure>Keyboard
<list order>
* Use the Tab and direction keys to move the highlight to the icon
  you want to select.
* Press Return or Spacebar.
<\list>
<procedure>Mouse
<list bullet>
* Click the icon.
<\list>
This markup creates this output:
<ex size>
Computer text here.
<\ex>
For computer listings that contain special character sequences used by HelpTag, use the <vex> (verbatim example) element as shown:
<vex size>
Computer text here.
<\vex>
The optional size attribute, which determines the size of the font used to display the example, can be specified as smaller or smallest. <ex> element is used to represent a directory listing in a terminal window.
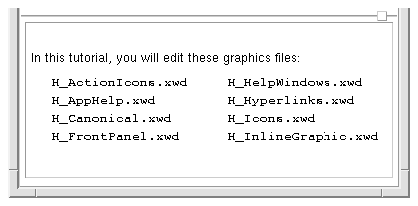
In this tutorial, you will edit these graphics files:
<ex>
H_ActionIcons.xwd     H_HelpWindows.xwd
H_AppHelp.xwd         H_Hyperlinks.xwd
H_Canonical.xwd       H_Icons.xwd
H_FrontPanel.xwd      H_InlineGraphic.xwd
<\ex>
The markup produces this output:
Line breaks appear where you enter them in your source file. If the example is too wide for the help window, a horizontal scroll bar appears so the user can scroll to see all the example text.
- <note>
Body of note here.
<\note>
<caution>
Body of caution here.
<\caution>
<warning>
Body of warning here.
<\warning>
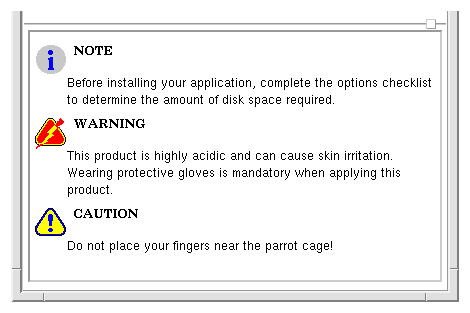
Names of the default icons used by the Help System for note, caution, and warning elements are specified in the following entities.
If you create your own icon images for notes, cautions, and warnings, be sure to keep them small so they will fit into the area allotted. Also, the graphic images must be in your HelpTag search path, which is specified in your helptag.opt
file.
<note>
Before installing your application, complete the options checklist
to determine the amount of disk space required.
<\note>

<warning>
This product is highly acidic and can cause skin irritation. Wearing
protective gloves is mandatory when applying this product.
<\warning>

<caution>
    Do not place your fingers near the parrot cage!
<\caution>
Figure 3-1 Note, warning, and caution help icons
- <emph> text <\emph>
- !! text !!
A thousand times <emph>no<\emph>
Or, using the shorthand form:
A thousand times !!no!!
In both cases, the word "no" is displayed in italics.
- <book> title <\book>
- book| title |
<book|The Help System Author's and Programmer's Guide|
<term> element as shown:
- <term nogloss> bold text <\term>
- <term nogloss |bold text |
<term>
element is used to create a glossary entry. However, by adding the nogloss
parameter, the text is displayed in a bold font without being added to the glossary.
- <computer> text <\computer>
- `` text ''
This markup:
Add the search path to your "helptag.opt" file.
produces this output:
Add the search path to your helptag.opt file.
- <var> text <\var>
- <var |text |
- %%
text %%
dtpad %%filename%%
It produces this output:
dtpad filename
Variables can appear within computer text or computer example listings. This example specifies volume as a variable part of a file name:
The HelpTag software takes your "%%volume%%.htg" file as input.
It produces:
The HelpTag software takes your volume.htg file as input.
In both of these examples, the %% pairs could have been entered with the long form (<var> ...<\var> ) or the short form (<var| ...| ).
<chapter>
, <s1...s9>
, <location>
, <p>
, <image>
, <figure>
, and <graphic>
. Help supports five types of hyperlinks:
<xref>
and <link>
, that can be used to create hyperlinks to an ID. In addition, the <p>
, <image>
, and <figure>
elements can be used to create hyperlinks using a graphic image.<xref>
element. When you use <xref>
to create a link, you specify the ID of the topic that you want to link to. The title of the topic is inserted in place of the <xref>
element and becomes the active hyperlink.
Hypertext links created with <xref>
display the new topic in the same window. If you desire different behavior by using the other link types, then you must use the <link>
element.
Also, you cannot use <xref> to jump to topics that have built-in IDs (such as <hometopic> or <glossary> ). To create a hyperlink to any of those elements, you must use the <link> element.
- <xref id>
<s1 id=colorpalettes>Desktop Color Palettes
.
.
.
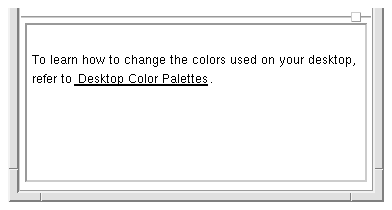
To learn how to change the colors used on your desktop,
refer to <xref colorpalettes>.
The section title replaces the <xref> element. The title is a hyperlink, designated by an underline. This is how the sentence would appear in a help volume.
<xref>
or <link>
element to create standard hypertext links. However, to use the other types of links listed in the section"Creating Hyperlinks,"
you must use the <link>
element.
- <link id>text<\link>
<link> element instead of the <xref> element.
<s1 id=colorpalettes>Desktop Color Palettes. . . To learn how to change the colors used on your desktop, refer to <link colorpalettes>Desktop Color Palettes<\link>.
- <link hyperlink="id">text<\link>
Return to <link hyperlink="_hometopic">Introduction<\link>.
- <link hyperlink="volume id" JumpNewView>text<\link>
GeoMap:
To view a map of the United States, see <link hyperlink="GeoMap
_hometopic"> Geography Maps <\link>.
Here's the same link, but it displays the topic in a new window:
To view a map of the United States, see <link hyperlink="GeoMap
_hometopic" type=JumpNewView> Geography Maps <\link>.
This link jumps to the topic, DesktopKeyboardNav, in the help volume named Intromgr.
For more information, see <link hyperlink="Intromgr
DesktopKeyboardNav">Keyboard Shortcuts for the Desktop<\link>.
If the help volume you are targeting is not registered on the desktop, then you must provide a complete path name to the volume or specify the appropriate search path in your helptag.opt
file.
- <term>text<\term>
- ++
text++
- <link id Definition>text<\link>
- <link hyperlink="volume id" Definition>text<\link>
<link hyperlink="_copyright" type=Definition>Version
Information<\link>
The phrase "Version Information" becomes the hyperlink text (dashed underline).
- <link manpage Man>text<\link>
- <link hyperlink="section manpage" Man>text<\link>
Refer to the <link grep Man> grep(1)<\link> command.
"Man" is a keyword for the <link>
element, so if you want to create a link that displays the man page for the man
command, you must use the hyperlink
parameter:
Refer to the <link hyperlink="man" Man>man(1)<\link> command.
To display a man page in a particular section, precede the man page name with the section number. The following link displays the "mkdir" man page from section 2 (which is different from the man page of the same name in section 1):
Refer to the <link hyperlink= "2 mkdir" Man>mkdir(2)<\link> command.
- <link hyperlink="data" AppDefined>text<\link>
Choose a report type:
<list plain tight>
* <link hyperlink="Report-Daily" AppDefined>Daily Report<\link>
* <link hyperlink="Report-Month-To-Date" AppDefined>MTD Report<\link>
* <link hyperlink="Report-Year-To-Date" AppDefined>YTD Report<\link>
<\list>
If your application is set up to handle these special links and to interpret the hyperlink strings, it could generate the appropriate report based on the hyperlink chosen by the user.
For a complete example, refer to the sample application code located in the /usr/dt/share/examples/dthelp directory.
- <link hyperlink="_id">text<\link>
The predefined IDs for the meta information topics are listed below:
<abstract>
<copyright>
<title>(_title)
The Help System uses resources to define the behavior of execution
links. The DtNexecutionPolicy resource is set in an
application's application defaults file to modify how execution links are
handled by the Help System. In addition the Help System uses a set of resources
called execution aliases. An execution alias is a resource that assigns
a name (or label) to the command string or script that an execution link
executes.
application_name.executionAlias.alias_name: command
Where:
StartDtterm, which starts a terminal emulator. The & (ampersand) starts the command in the background.
Dtterm.executionAlias.StartDtterm: dtterm &
This entry creates an alias named, xclockAlias, that executes the xclock application in an application named NightAlert.
NightAlert.executionAlias.xclockAlias: xclock &
<link>
element or used in conjunction with elements that have a hyperlink parameter, such as <p>
or <figure>
.
- <link "DtHelpExecAlias alias_name [default_command]" Execute >text<\link>
xclockAlias. The resource definition for the alias is shown in the section "Execution Aliases."
The link starts the xclock
program running in the background. The phrase "Start the Clock" becomes the hyperlink. Clicking the hyperlink runs the xclock
program in a separate window. To end the program, close the window.
<link "DtHelpExecAlias xclockAlias" Execute>Start the Clock<\link>
Here is the same hyperlink including an optional default command.
<link "DtHelpExecAlias xclockAlias xclock &" Execute>Start the
Clock<\link>
DtNexecutionPolicy resource enables a system administrator or user to select an appropriate level of security for a given application.The resource values that can be set are:
help_execute_query_all
help_execute_query_unaliased
help_execute_none
help_execute_all
help_execute_query_unaliased
. Any execution links defined as execution aliases will be automatically executed, whereas the Help System will display a confirmation dialog box for any other execution links.
It is not recommended for the application developer to set the DtNexecutionPolicy because this prevents a system administrator or user from altering the value.
<!entity graphic-entity FILE "filename.ext">
Remember, all entity declarations must come before any other markup at the top of your help volume.
<figure entity=graphic-entity>
caption string
<\figure>
Where graphic-entity is the entity name for the graphic file you want to display, and caption string is an optional string. Caption text is displayed above the graphic.
If you want the figure to be a hyperlink, use the ghyperlink (graphic hyperlink) and glinktype (graphic link type) parameters as shown:
<figure entity=graphic-entity ghyperlink="id" glinktype=type>
caption string
<\figure>
The ghyperlink and glinktype parameters work just like the hyperlink and type parameters for the <link> element.
<!entity FirstPicture  FILE "first.tif">
<!entity SecondPicture FILE "second.pm">
<figure entity=FirstPicture>
Here's the First Picture
<\figure>
<figure nonumber entity=SecondPicture>
<\figure>
If you add an ID to a figure, you must have a caption. The caption is needed in case an <xref>
uses the figure's ID; if so, the caption is inserted in place of the <xref>
and becomes a hyperlink to the figure.
<figure entity=SecondPicture ghyperlink="xclock &" glinktype=execute>
Choose This Figure to Start the Clock
<\figure>
<!entity graphic-entity FILE "filename.ext">
Remember, all entity declarations must come before any other markup at the top of your help volume.
... text <graphic entity=graphic-entity> text ...
Where graphic-entity is the entity name for the graphic file you want to display.
<link parameters><graphic entity=graphic-entity><\link>
<!entity StopWatch FILE "stopwatch.bm">
Within the help text, the image is inserted using the <graphic> element:
Whenever you see the <graphic entity=StopWatch> symbol, stop and
answer the quiz questions.
This markup produces this output.

<!entity graphic-entity FILE "filename.ext">
<p gentity=graphic-entity> Paragraph text here ...
Where graphic-entity is an entity name that refers to the graphic file you want inserted.
<!entity HelpKeyIcon FILE "helpkey.xwd">
Then, enter the paragraph:
<p gentity=HelpKeyIcon gposition=left> The F1 key is a Help key. When
you press F1, the application you are using displays the help topic
most closely related to your current activity.
To right-justify the graphic, add the gposition parameter like this:
<p gentity=HelpKeyIcon gposition=right>Many desktop components
support multicolor icons, in addition to two-color images.
Here's the markup for a paragraph wrapped around an icon, where the icon is a hyperlink that displays a topic with the ID icon-editor in a new window:
<p gentity=my-icon ghyperlink="icon-editor" glinktype=JumpNewView>
Many desktop components support multicolor icons, in addition to the
two-color images.
Some special character entities are declared in the file helpchar.ent . The helpchar.ent file is located in the /usr/dt/dthelp/dthelptag directory . To access these characters, either copy the particular entity declaration into your own volume, or include the entire helpchar.ent file. Unused entity declarations are ignored.
Refer to Chapter 6, "Summary of Special Character Entities," for a complete list of the available characters.
<!entity entity-name FILE  "helpchar.ent">  &entity-name;
&entity-name;
Also, add this line to your helptag.opt file:
search=/usr/dt/dthelp/dthelptag
If the character is built into HelpTag, you can skip step 2.
&entity-name;
©
To display the uppercase greek letter sigma (
<!entity  SpecialCharacterEntities  FILE   "helpchar.ent">
&SpecialCharacterEntities;
Then you can place the following entity reference where the sigma character is to appear:
&Usigma;
As with any entity, case is not significant in the entity names for special characters. In addition to standard comments, HelpTag also provides a <memo> element for entering writer's memos. Memo notes appear in your help topics during reviews, but not when you make your final help files. Authors commonly use the <memo> element to write questions or make notes to reviewers.
- <!-- text here is completely ignored -->
<!-- Here is my rough draft of the introduction: -->

Welcome to my application. This software
is <!-- perhaps --> the fastest and most
efficient software you'll ever own.
- <memo> text <\memo>
<memo>Team: Will the product also
support 32-bit characters?<\memo>
If you process the help volume with the following command (or include memo in your helptag.opt file), the memo appears in the help text in a bold font.
dthelptag volume memo
If the memo option is not used (or the nomemo option is used), the text within the memo is ignored and does not appear in the help text.
- <idx>keyword<\idx>
- <idx|keyword|
- <idx>keyword<sort>sortkey<\idx>
<s1 id=getting-started>Getting Started with Helpview
<idx>starting Helpview<\idx>
<idx> Helpview, starting<\idx>

Welcome ...
.
.
.
The following example indexes the + (plus character), putting it in the keyword index where the word "plus" would appear:
<idx>+<sort>plus<\idx>
Throughout your help volume, each key word or phrase that you enter with the <term> element automatically becomes a definition hyperlink to the term's definition in the glossary.
- <term>word or phrase<\term>
- <term|word or phrase|
- ++
word or phrase++
<term "glossary form">word or phrase<\term>
Where glossary form
is the term exactly as it appears in the glossary. This is useful if the term must be plural in a help topic (because of its context), but must be singular in the glossary. Terms are displayed using a bold font and automatically become a definition hyperlink. When the term is chosen, its glossary definition appears in a quick help dialog.
A ++widget++ is the fundamental building block of OSF/Motif user
interfaces.
If the glossary entry is "widget", but you need to use the plural form within the sentence, you could enter the term like this:
<term  "widget">Widgets<\term> are the fundamental building blocks
of OSF/Motif user interfaces.
If you want to enter the same term, but you either don't want to include it in the glossary or you don't want it to be a hyperlink, use the nogloss parameter like this:
<term nogloss> Widgets<\term>are the fundamental building blocks of
OSF/Motif user interfaces.
The equivalent short form is:
<term nogloss|Widgets| are the fundamental building blocks of
OSF/Motif user interfaces.
- <glossary>
.
.
.
<dterm>word or phrase
Definition of the term
.
.
.
<glossary>. . . <dterm>SGML Standard Generalized Markup Language. An international standard [ISO 8859: 1986] that establishes a method for information interchange. SGML describes constructs for marking the structure of information separate from its intended presentation or format.


