Using the NDS browser
Overview
An extension NLM residing on the Web Server allows clients to
browse the NDS (Novell Directory Services) tree using an HTML
browser, like Netscape Navigator, and view the objects and their
attributes within the tree. Object types are represented by an icon and
the object name.
To enable users to run the NDS browser extension, you must map a
URL to the NDS browser. Once the extension is mapped, users start
the NDS Browser by requesting this URL. When the Web Server
receives the request, it calls the NDS browser extension, which
creates an HTML page display of the NDS tree. From this page,
users use their mouse to click on the icons and browse through the
tree.
When an object is clicked for display, a default "home page" for the
object is dynamically created, listing its objects and attributes. For
user objects, a special home page can be created using an HTML
authoring tool. This page is then associated with the user object. A link
to the special home page displays on the dynamically-created default
home page. You associate a special home page with a user object via
a new NDS attribute, the Home Page attribute. Another new NDS
attribute, the Photo attribute, associates a graphics file with a user
object. This graphics file is displayed above the home page of a user
object.
A NWADMN3X or NWADMN95 snap-in module is used to modify
the NDS schema to create the home page and photo attributes. To
modify the schema, you must enable the snap-in module. Once the
snap-in module is enabled, you can associate a home page or photo
with a user object and remove a home page or photo association.
The NDS browser is disabled by default. You should enable the NDS
browser only if you want external users from the Internet to read
public information stored in your NDS trees. You can limit the amount
of information that is visible from the NDS browser. For example, if
you would like only the e-mail address property to be visible, set up
the [PUBLIC] trustee to have read rights to this property of user
objects.
The executable file for the NDS browser, (NDSOBJ.NLM) is copied
to the SYS:WEB/DOCS/CGI/NDSOBJ directory during Web Server
installation. When the Web Server receives an HTTP request for the
NDS browser, it consults a table in the /WEB/CONFIG/SRM.CFG
file to map the URL the NDS browser extension. To add this mapping
and enable the NDS browser, perform the following using the
WEBMGR administration utility:
- Click File.
-
- Click Select Server.
-
- Select the \WEB directory on the drive that is mapped to the
server and click OK.
-
- Click on the Enable NDS browsing check box.
-
- Click OK.
-
- Click Save and Restart.
-
- Type the Web Server password and click OK.
-
The WEBMGR utility inserts a LoadableModule directive in the
SRM.CFG file that maps to
SYS:WEB/DOCS/CGI/NDSOBJ/NDSOBJ.NLM. This mapping
allows for URLs in the following formats:
http://dns_name/nds/
http://dns_name/nds/nds_object_name
where dns_name is the DNS host name for the Web Server and
nds_object_name is the name of the NDS object for the extension to
display.
If you move the NDSOBJ.NLM extension file, you must manually edit
the mapping of the LoadableModule directive in the SRM.CFG file.
Refer to the Web Server Dynamic Web Page Programmer's Guide
for details on mapping a request to an extension NLM.
Before users can start the NDS browser, you must have enabled the
NDS browser. If you are using the mapping suggested in this
document, your users can use the following URL to start the NDS
browser.
http://hostname/nds/
where hostname is the DNS name for the host running the Web
Server.
This URL displays a dynamically-created page containing all the trees
available for the user to browse.
When users want information on a particular object and know the
NDS object name for that object, they can specify the URL in the
following format:
http://hostname/nds/nds_object_name
where nds_object_name is the Federated Name, starting with the
Tree name.
To browse the NDS tree the user starts the NDS browser and then
clicks on the object icons on the HTML pages to see the information
within that object.
A previous button is available to browse up the NDS tree structure.
The browser displays the following icons:

Root | 
Tree | 
Country | 
Organizational
Unit |

Group | 
Volume | 
Printer | 
Queue |

User | 
Alias
| 
Computer
| 
Directory Map |

Distribution
List
| 
Device
| 
BTRIEVE
Server | 
Communications
Server
|

Bindery
Object
| 
Local
| 
Message
Group
| 
Message Server
|

NetWare
Server
| 
Organizational
Role
| 
Organization
| 
Organizational
Person
|

Profile
| 
Print Server
| 
Unknown | |
The NDS browser is a powerful tool which allows clients to fully
browse NDS (Novell Directory Services) using an HTML browser
and view the objects and their attributes within the tree. Once a user
has access to this tool, he/she can browse all available trees in NDS
and all the public object information contained within each tree. If you need
to you can restrict access to the NDS browser to a select group of
users. Refer to Controlling Access to LCGI NLMs and User Access
Control in the RELEASE.HTM file.
A NetWare NWADMN3X or NWADMN95 snap-in module allows
the NDS schema to be modified so that "Home Page" and "Photo"
attributes can be added to and associated with a user object.
For Windows 3.X systems running NWADMN3X.EXE, the DLL file
for this module (WEBSNP3X.DLL) is copied to the SYS:\PUBLIC
directory of the server during Web Server install.
To enable the use of this module on Windows 3.X systems, you must
modify the NWADMN3X.INI file as follows:
- Using a text editor, open the \WINDOWS\NWADMN3X.INI
file on your workstation.
-
- Add the following line below the
[Snapin Object DLLs
WIN3X]
heading WEBSNP3X.DLL=WEBSNP3X.DLL
- Save the file.
For Windows 95 systems running NWADMN95.EXE, the DLL file
for this module is copied to the SYS:\PUBLIC\WIN95 directory.
To enable the use of this module on Windows 95 systems, perform
the following:
- Run the NWADMN95.EXE utility.
- Click on a user object, and check to see if the Home Page and
Photo Attribute button exists for the user.
- If the button does not exist, exit NWADMN95.
- Run the Registry Editor in the \WINDOWS directory on your
workstation. (C:\WINDOWS\REGEDIT.EXE.)
- Select Registry/Import Registry File...
- Choose the WEBREGED.REG file located in the
\PUBLIC\WIN95 directory of the server's SYS volume.
- Click OK.
- Run the NWADMN95.EXE utility again. When you start the
utility, the Home Page and Photo Attribute button will
automatically be added to all user objects.
To associate a home page or photo with a user object, perform the
following:
- If you have not already done so, enable the NWADMN3X or
NWADMN95 snap-in module.
- For home pages, use an HTML authoring tool to create the
home page.
- For photos, save the file in GIF format.
- Start NWADMN3X or NWADMN95.
The following prompt appears the first time you run the
NWADMN utility after enabling the snap-in module:
The DS Tree does not have the schema extensions to
support WEB attributes. Do you wish to extend it?
- Click OK.
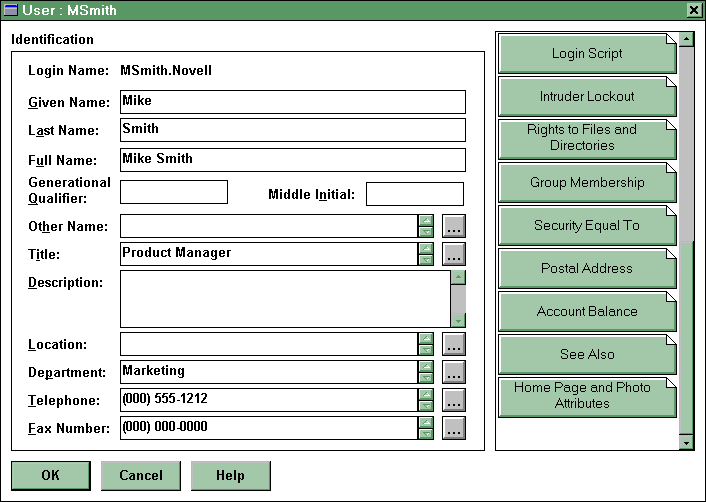
- From NWADMN3X or NWADMN95, select the user object
with which to associate a Home or Photo Page.
The following screen appears.
- Click the Home Page and Photo Attribute button.
The following screen appears.
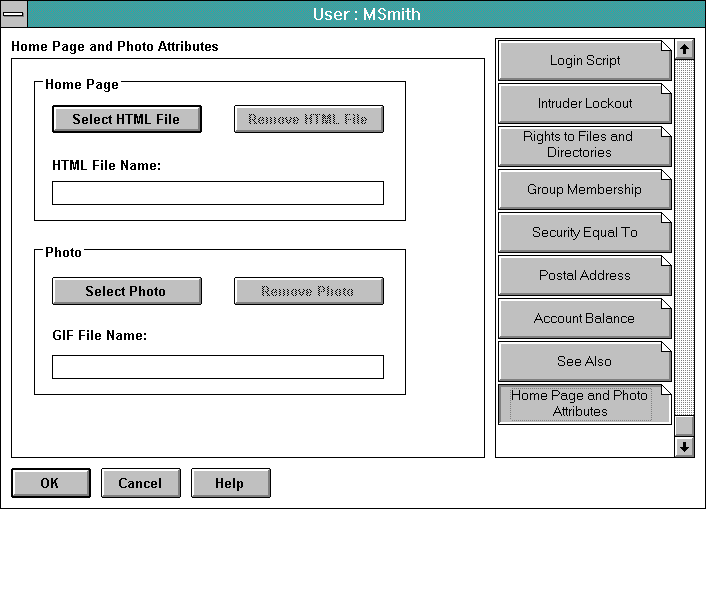
- To associate a home page, click Select HTML File.
A Windows File Open selection box appears.
- To associate a photo, click Select Photo.
A Windows File Open selection box appears.
- Browse to the HTML or GIF file or type the full path to the file
in the Command Line.
- Click OK to save the change.
To remove a home or photo association with a user object, perform
the following:
- Start NWADMN3X or NWADMN95.
-
- From NWADMN3X or NWADMN95, select the user object
from which to remove the association.
The following screen appears.
- Click the Home Page and Photo Attribute button.
The following screen appears.
- To remove a home page, click Remove HTML file.
If there is no home page associated with the user object, this
button is greyed out.
- To remove a photo, click Remove Photo.
If there is no photo associated with the user object, this button
is greyed out.
- Click OK to save the change.
Go to top of file or to the Novell NetWare Web Server Home Page.