 |
DECwindows Motif for OpenVMS Applications Guide
Using the Paintbrush

For an elegant stroke, one that creates a calligraphic effect, use the
Paintbrush tool. The Paintbrush applies paint along the path of the
pointer. Initially, the paintbrush has a solid stroke, but you can
choose a patterned stroke by changing the border pattern on the
Patterns palette, as described in Using Patterns.
To shape the tip of the Paintbrush:
- Click on the Paintbrush from the tool palette.
- Choose Brushes... from the Options menu.
The Brushes dialog box
appears, which contains an assortment of brush-stroke styles.
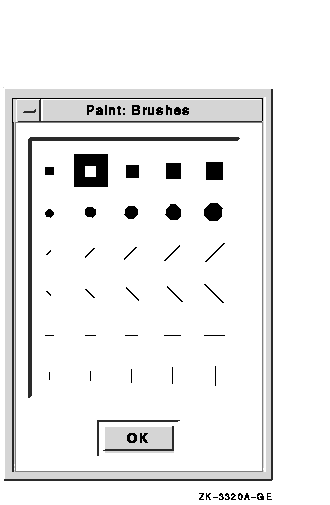
- Click on the brush-stroke style you want.
- Click on OK.
- Move the pointer into the drawing window and try out the new brush
stroke.
Editing Pictures
With Paint's electronic canvas, you can rearrange images easily in the
window. You can delete images entirely, move them to another part of
the window, copy them, or quick copy them. Paint can shrink or enlarge
selected images. Paint can also crop a picture, retaining one section
of the canvas and deleting the rest. For further effect, Paint can
reverse the foreground and background colors in a selected area.
Selecting Images
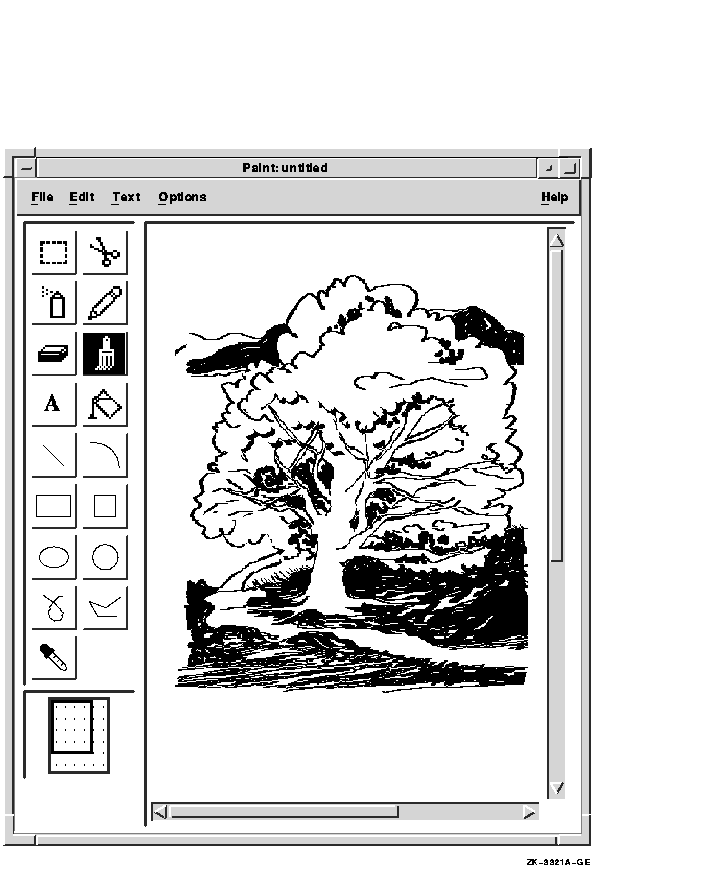
Two selection tools, the Box and the Scissors, mark a portion of the
drawing window for a graphics operation. The Box marks a rectangular
area, while the Scissors marks an area with an arbitrary shape. To
select the visible portion of the canvas, choose Select Window from the
Edit menu.
To use the Box tool, position the pointer in one corner of the area you
want to select and drag the pointer over the image.
To use the Scissors tool, drag the pointer around the boundary of the
object until you reach the starting point.
To cancel a selection, click in another part of the window or choose
another tool.
Moving Images
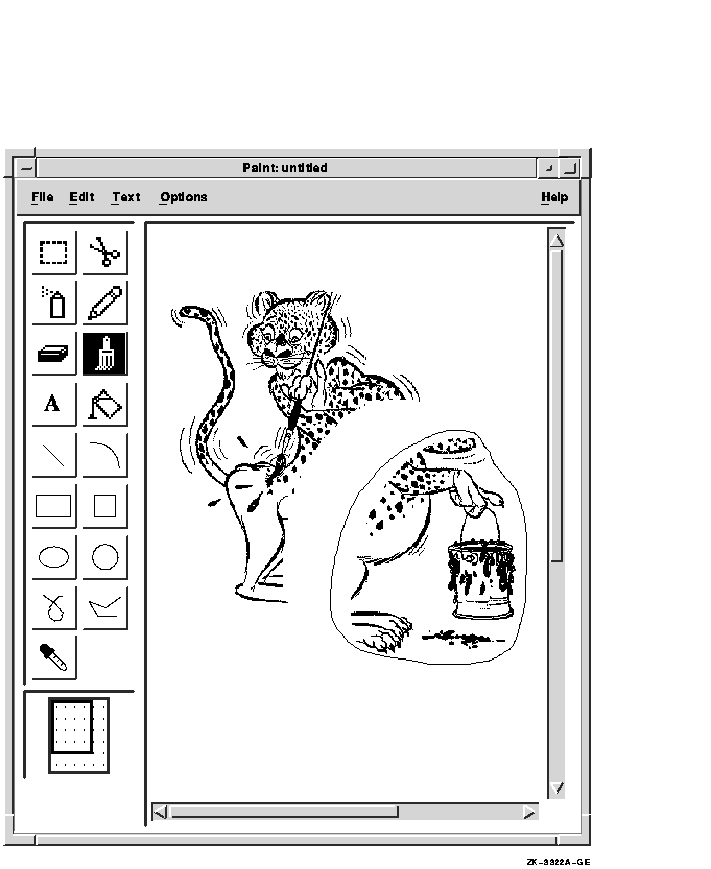
You can move an image from one location in the Paint window to another.
To move an image:
- Using the Scissors tool, select the image.
- Press MB1 inside the selected area and drag the image to the
desired location.
- Release MB1.
To cancel the selection, click in another part of the window or select
another tool.
Copying Images
Once you select an image on the canvas, you can copy the image, leaving
the original image intact. You can then paste the image onto the
canvas. Paint can paste graphic images that have been copied to the
clipboard from other applications, but it cannot paste text from other
applications.
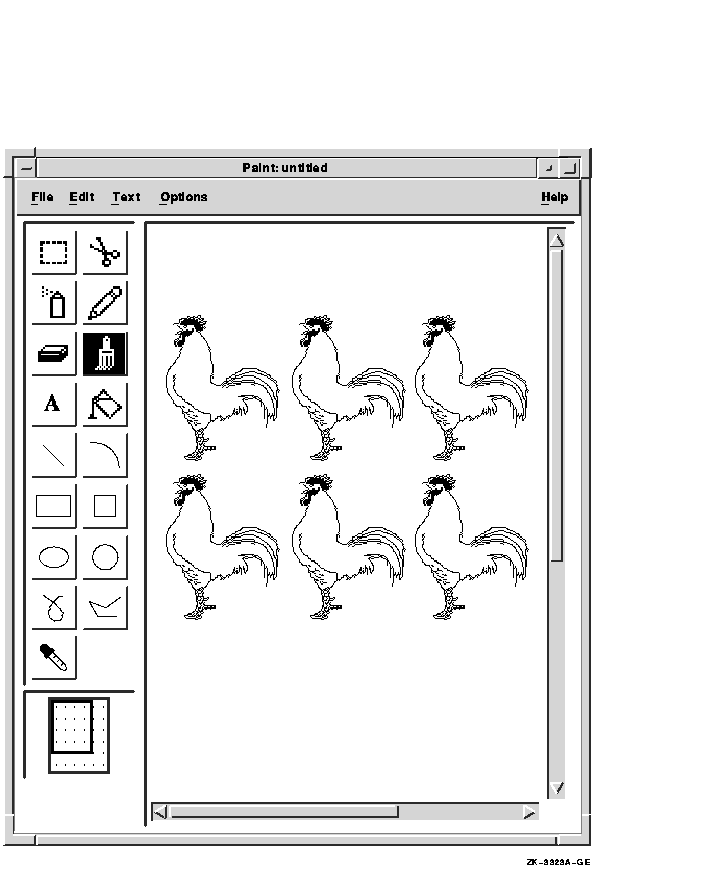
To copy an image in the same window:
- Using the Box or Scissors tool, select the image.
- Choose Quick Copy from the Edit menu.
Paint puts a copy of the
image on the canvas, leaving it selected.
- Position the pointer in the selected image and drag it to the
location you want.
To copy an image to the clipboard for use in another window:
- Using the Box or Scissors tool, select the image.
- Choose Copy for the Edit menu.
Paint copies the image to the
clipboard.
- Choose Paste from the Edit menu.
Paint puts a copy of the image
on the canvas, leaving it selected. A copy of the image remains in the
clipboard.
To cancel the selection, click in another part of the window or select
another tool.
To copy a selection to the clipboard without leaving a copy of it in
the original location, choose Cut from the Edit menu.
Sizing Images
You can modify the proportions of selected images.
To scale an image:
- Using the Box or Scissors tool, select the image.
- Choose Scale... from the Edit menu.
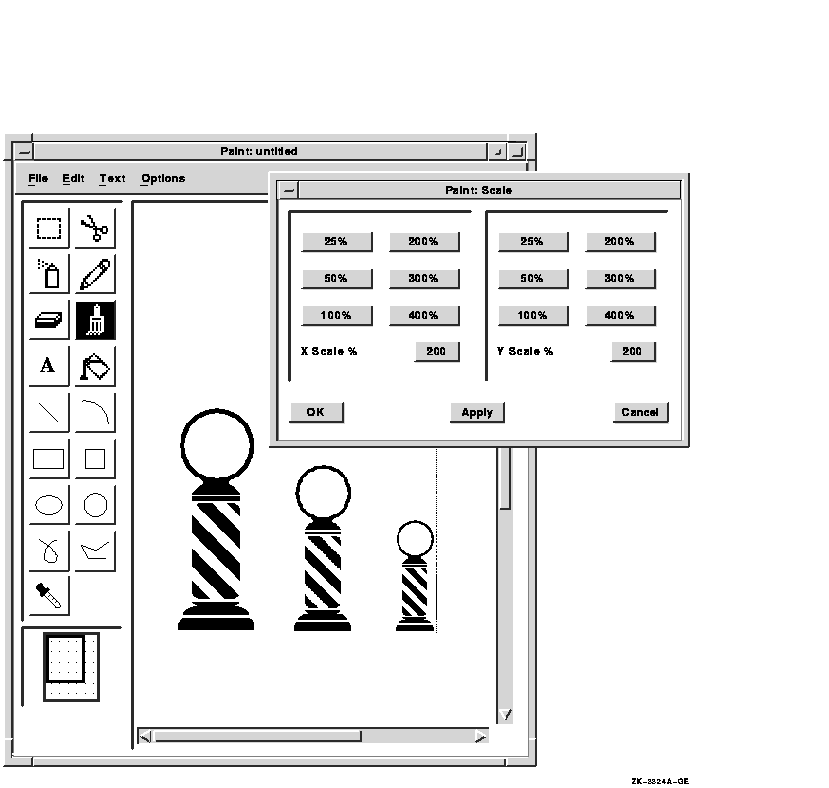
The Scale dialog box
appears.
- For both the x scale and the y scale, click on one of the percent
buttons to change the scale. If you want to specify your own
percentages, enter a number less than 100 to shrink the figure or a
number greater than 100 to enlarge the figure.
For example,
clicking on 25% reduces the selected area to one-fourth the original
size, while clicking on 200% makes the area twice as large as the
original.
- To complete the operation, click on OK.
To reverse the process and return to your original picture, choose
Undo Scale from the Edit menu.
To scale the entire canvas, choose Scale Picture... from the Edit menu.
Cropping a Picture
One section of a picture might develop so well that you decide to keep
it but want to discard the rest. To extract a portion of the picture,
you use the Crop menu item.
To crop a picture:
- Using the Box or Scissors tool, select the section of the picture
you want to keep.
- Choose Crop from the Edit menu.
Paint repositions the cropped
picture in the upper left corner of the window and discards the rest of
the picture. To restore the original picture, choose Undo Crop from the
Edit menu.
Viewing Portions of the Canvas
By choosing Full View from the Options menu, you can display the entire
canvas. In Full View mode, the only tool available is the Box. To crop
your picture in Full View mode, select the area using the Box tool and
then choose Crop from the Edit menu.
To return to only a portion of the canvas, choose Paint View from the
Edit menu.
Editing in Detail
Not only does Paint magnify patterns in the Edit Patterns dialog box so
you can see them better, it also magnifies portions of the canvas with
the Zoom On menu item. The Zoom magnifying frame acts like a magnifying
glass in the drawing window, enlarging an image to eight times its
original size.
To magnify a portion of a picture:
- Choose Zoom On from the Options menu.
The Zoom window appears
beside the Paint window, and a magnifying frame appears in the Paint
window. The magnifying frame demonstrates the size of the image that
Paint magnifies in the Zoom window. To magnify a larger area of the
canvas, you can resize the Zoom window.
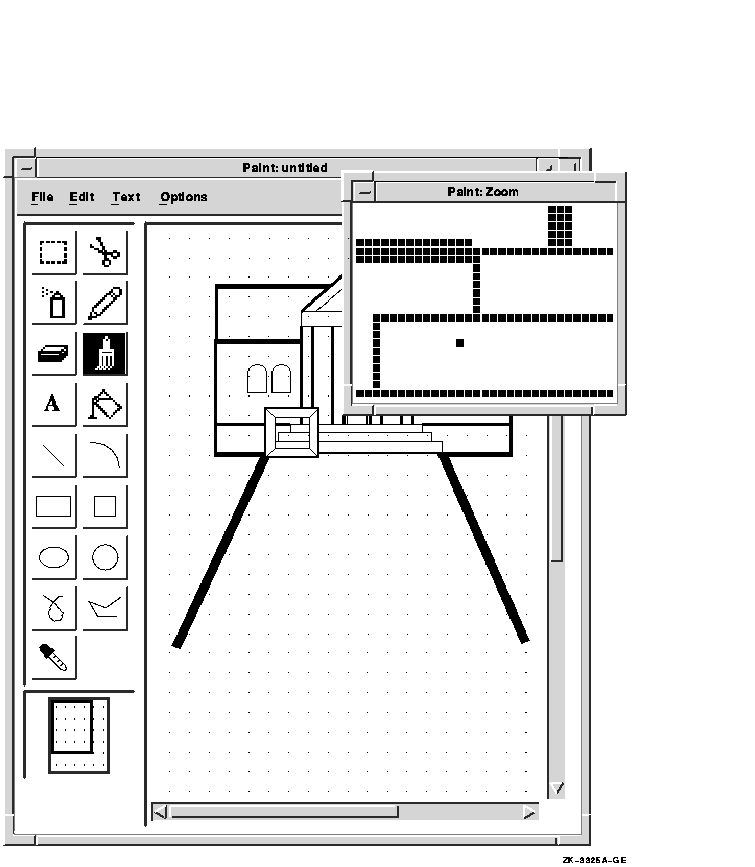
- Press MB1 inside the magnifying frame and drag the frame over the
area you want to edit. Release MB1.
Notice that the Zoom window
contains an enlarged version of the area that shows in the magnifying
frame.
- Choose the Pencil from the tool palette.
- Bring the pointer into the Zoom window and use the Pencil tool to
add fine details to the image. Either click on individual pixels or
draw over them.
Notice that the image in the drawing window changes
as you edit in the Zoom window, so you can see how the modified figure
looks in normal proportions. Continue editing pixels until you are
satisfied with the overall effect.
- To edit other areas of the drawing window, drag the magnifying
frame to the next location.
Edit the pixels in the Zoom window as
before.
To close the Zoom window, choose Zoom Off from the Options menu.
Including an Image File
You can copy an image from a file into your current Paint window, as
long as the image is not larger than the size of the screen.
To copy an image from a file into your window:
- Choose Include... from the Edit menu. The Include dialog box
appears.
- In the Files list box, double click on the file name of the image
file you want to copy to your window. By default, image files have the
IMG extension.
- Click on OK. The image file is copied to your window.
Inserting Text

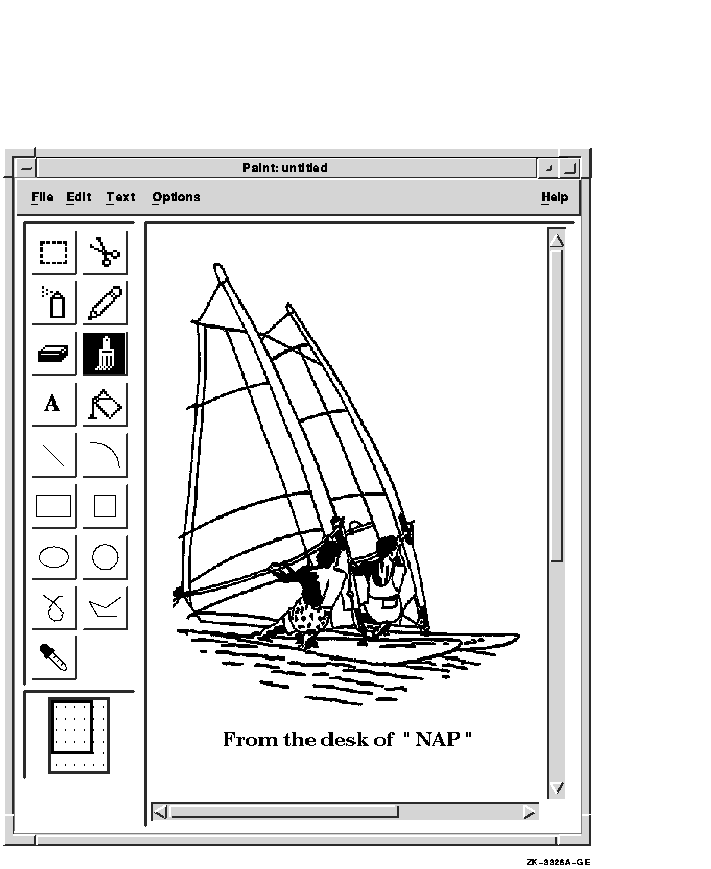
You can insert text anywhere in the Paint window. The text can be
different fonts, sizes, and styles. You can change the appearance of
text in the drawing window up until the moment you click to complete
the text entry. After that, Paint incorporates the text into the
graphic image.
To insert text:
- Choose the Text tool from the tool palette.
- Position the pointer in the Paint window where you want to insert
text and click MB1.
Paint inserts a left corner bracket to mark the
left margin of the text entry and displays the insertion cursor next to
it.
- Type in text from the keyboard, formatting it with the Tab and
Return keys.
- To modify the text font, pull down the Text menu and drag the
pointer to the submenu icon next to the Family menu item to view the
submenu. Release MB1 over your choice of font.
- To change the text from regular to boldface, pull down the Text
menu and drag the pointer to the submenu icon next to the Style menu
item to view the submenu. Release MB1 over the Bold menu item.
You
can also choose an italic font from the Style submenu.
- To adjust the size of the text, pull down the Text menu and drag
the pointer to the submenu icon that appears next to the Size menu item
to view the submenu. Release MB1 over your choice of pica size.
Paint applies the choices you make to the text you entered.
- To complete the entry with its current characteristics, either
move the pointer to another part of the window and click MB1, or click
on another tool.
The inserted text becomes part of the picture; you can no longer erase
text with the Delete key (<X|) or change its characteristics
with items from the Font menu. To erase the text, choose Undo Text from
the Edit menu.
Sizing the Canvas
You can tailor the size of a Paint canvas.
To alter the size of the canvas:
- Choose Picture Size... from the Options menu. The Picture Size
dialog box appears.
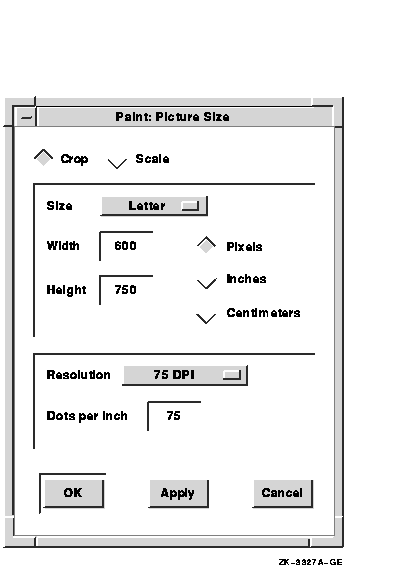
The Picture Size dialog box shows the current canvas size with its
dimensions converted to pixels, inches, or centimeters.
- In the dialog box, click on either the Crop or Scale radio button
to specify how you are changing the Paint window. You can then set the
dimensions to be in pixels, inches, or centimeters by clicking MB1 on
the appropriate radio button. If you choose Non-Standard from the Size
option menu, you can type in the height and width you want in the
associated text entry boxes.
To display the Size option menu, press
MB1 inside the Size option box. You can then choose Non-Standard,
Letter (8 x 10 inches; 20 x 25 centimeters) or Screen (size of the
screen in pixels). Non-Standard enables you to supply your own value.
Letter is the default.
Additionally, you can modify the number of
dots per inch (DPI). This option lets you manipulate high-resolution
images.
To modify the DPI, press MB1 on the Resolution Options box.
The Resolution menu appears. Choose 75, 100, or 300 DPI, or the
Non-Standard menu item. Non-Standard lets you type in the resolution
you need. The change is evident when you print the picture rather than
in the Paint display.
- Click on OK.
Using Accelerators
You can use certain key combinations, called accelerators, to perform
common Paint operations quickly. The following table shows each key
combination and its corresponding function.
| Press |
To Produce |
|
Alt+Delete
|
Undo+
|
|
Ctrl+Z
|
Exit
|
|
Shift+Remove
|
Cut
|
|
Ctrl+Insert Here
|
Copy
|
|
Ctrl+O
|
Open
|
|
Shift+Insert Here
|
Paste
|
|
Ctrl+P
|
Print
|
|
Ctrl+S
|
Save
|
|
Ctrl+Q
|
Quick Copy
|
+Alt is the Compose Character key.
In addition to using accelerators, you can also use key combinations to
manipulate Paint tools. To produce the results listed in the following
table, press and hold the Shift key while you drag MB1.
| Tool |
Effect |
|
Rectangle
|
Causes the rectangle to become a square
|
|
Line
|
Causes the line to be at an angle that is a multiple of 45 degrees
|
|
Paintbrush
|
Causes the image to be horizontal or vertical
|
|
Pencil
|
Causes the image to be horizontal or vertical
|
|
Ellipse
|
Causes the ellipse to become a circle
|
|
Polyline
|
Causes angles to be multiples of 45 degrees
|
|
Eraser
|
Causes the eraser to erase vertically and horizontally only
|
|
Arc
|
Causes the image to be a quarter circle (instead of a quarter ellipse)
|
Exiting Paint
To exit Paint, choose Exit from the File menu. If you try to exit
without saving your picture, Paint asks whether you want to save the
picture before exiting. Click on Yes, No, or Cancel.
Chapter 12
Using Print Screen

Print Screen lets you take a snapshot of the entire screen or just a
portion of the screen. You can save the snapshot to a file or print it,
or both.
This chapter describes how to
- Start Print Screen
- Take screen snapshots
- Change the Print Screen settings
- Exit Print Screen
Starting Print Screen
To start Print Screen, choose Print Screen from Session Manager's
Applications Menu.
Print Screen options and settings appear in the Print Screen window.
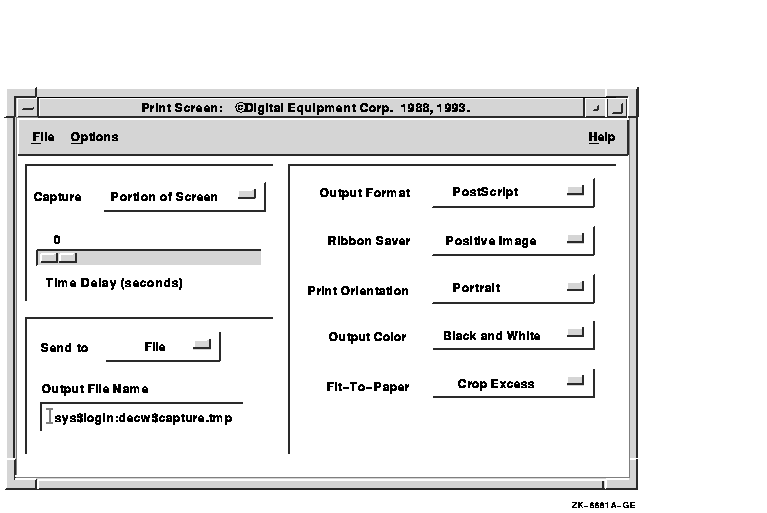
The default Print Screen settings let you capture screen snapshots in a
file formatted for POSTSCRIPT printers. However, you can change the
settings to accommodate your particular needs. For a description of the
Print Screen settings, see Changing the Print Screen Settings.
Taking Screen Snapshots

To take a snapshot of your screen, you use the Send to options menu.
You can choose to save a screen snapshot to a file, print the snapshot,
or do both.
To take a screen snapshot:
- Arrange the windows on the screen as you want them captured.
- From the Send to options menu, choose to save the snapshot to a
file, to print it, or both.
- Specify a file name in the Output File Name entry box or accept the
default file name.
- From the Capture options menu, choose to capture the entire screen
or a portion of the screen.
- Choose Print or Print... from the File menu.
If you chose Send
to Printer or Send to Both in step 2, Print sends the snapshot to the
default printer, whereas Print... displays a dialog box for you to
choose a specific printer.
If you chose Send to File in step 2,
Print saves the snapshot to a file; the file is not immediately
printed.
If you chose Capture Entire Screen in step 3, the snapshot
operation proceeds immediately, and Print Screen displays a watch
cursor until the snapshot is completed.
If you chose Capture
Portion of Screen, continue with the next step.
- The pointer changes to a capture cursor (+). Move the capture
cursor to the upper left corner of the area you want to capture.
- Press and hold MB1.
- Drag the capture cursor until a box surrounds the area you want to
capture.
- Release MB1.
The cursor changes to a watch cursor until the
snapshot is completed.
Using a Time Delay
When you capture the entire screen or a portion of the screen, you
might need some time to rearrange your screen display before the
snapshot activates. For example, you might want to minimize a window or
click on a buried window to give it input focus.
To take a snapshot of all or part of the screen display after a time
delay
- Set the Capture and Send to options menus to the settings you want.
(See Taking Screen Snapshots.)
- Specify how many seconds to delay by pointing to the Time Delay
slider, pressing MB1, and dragging the slider to the number of seconds
you want.
- Choose Print or Print... from the File menu.
If you choose
Print..., the Queue Options dialog box appears.
- Enter the options you want.
- Click on the OK button.
The time delay begins.
- During the time delay, arrange the objects on your screen as you
want them captured.
- The time delay ends.
If you chose Entire Screen from the
Capture options menu, the whole screen is immediately saved to a file
or printed, or both.
If you chose Portion of Screen, the pointer
changes to a capture cursor (+), and you do the following:
- Move the capture cursor to the upper left corner of the area you
want to capture.
- Press and hold MB1.
- Drag the capture cursor until a box surrounds the area you want to
capture.
- Release MB1.
The portion of the screen you captured is saved to
a file or printed, or both.
Specifying Output File Names
By default, Print Screen names the output file that contains a screen
snapshot DECW$CAPTURE.TMP. This file is placed in your SYS$LOGIN
directory, which is your top-level directory.
To direct the output to another directory or file, click on the Output
File Name entry box and type another file name. Do not use any logical
names that are already defined in the system login command file
(SYLOGIN.COM) or in your login command file (LOGIN.COM).
Changing the Print Screen Settings
To change the settings in the Print Screen window:
- Place the pointer on the setting you want to change.
- Press MB1. An options menu appears.
- Choose the setting you want.
- Release MB2. The new setting appears.
To save your settings or to specify the system defaults, choose the
appropriate menu item from the Options menu.
You can change any of the following settings in the Print Screen
window.
Output Format
By default, DECwindows captures a screen snapshot in a file formatted
for POSTSCRIPT printers. You can change the output format by choosing
Sixel or DDIF from the Output Format options menu.
You can view sixel files in a DECterm window or on a VT screen and
print them on certain printers. Choose Sixel Options from Print
Screen's Options menu to display a dialog box where you can select
screen and printer options for viewing or printing sixel files.
DDIF (Digital Data Interchange Format) files can be used with
applications such as Paint, CDA Viewer, and DECwrite.
Ribbon Saver
By default, screen snapshots are printed as a positive image (a black
image on a white background).
To reverse the black and white portions of the printed output, choose
Negative Image from the Ribbon Saver options menu.
Print Orientation
By default, the Portrait orientation is used for printing snapshots.
You can change the print orientation by choosing Landscape or Best Fit.
The Best Fit option automatically determines the print orientation
based on the shape of the snapshot.
Output Color
The Output Color settings are Black and White, Color, and Gray Scale.
Only the settings applicable to your workstation appear. By default,
Print Screen captures screen snapshots in black and white.
If your workstation or printer supports color or gray-scale output, you
can use the Color or Gray Scale options.
For example:
- If you are using a color workstation and a color printer and you
choose Color from the Output Color options menu, the printed image
matches (as closely as possible) the colors you see on the screen.
- If you have a color workstation and you choose Gray Scale, the
printed output reflects the range of colors in shades of gray.
- If you have a color workstation and you choose Black and White, the
captured output is high-contrast black-and-white image.
Fit-To-Paper
By default, Print Screen prints as much of the image as will fit on the
paper at full size and crops the excess.
If you do not want to use the Crop Excess option, you can choose one of
the following options:
- Scale to Fit
Scales the snapshot up or down so that the entire
snapshot is printed and fills as much of the paper as possible.
- Reduce Only
Reduces the size of a snapshot to fit the printer
paper.
- Increase 2:1
Doubles the size of a printed snapshot or of a
snapshot saved to a file.
- Decrease 2:1
Halves the size of a printed snapshot or of a
snapshot saved to a file.
Exiting Print Screen
To exit Print Screen, choose Exit from the File menu.
|


