Connecting a Printer to
Your Zip® Drive

You can connect a printer or scanner to the data pass-through connector on the Zip® drive by using a standard printer cable.

NOTE: You must install the IomegaWare software and then connect your Zip® drive to your computer before connecting a printer or scanner to your Zip drive. If this has not been done, see Installing IomegaWare Software and Connecting Your Zip Drive.

  1. Shut down your computer and printer and disconnect power to the Zip® drive.

    | top of page |

  2. Connect the printer cable to the data pass-through connector on the Zip® drive.

  3. Connect the printer cable to the printer (if not already connected).

  4. Turn on your computer, reconnect power to the Zip® drive, and turn on your printer (or use a power strip to turn on all three at once).

    If this is the first time connecting your printer to your computer, you should now install any software that shipped with your printer.


    | top of page |
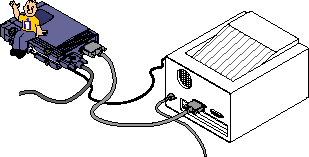
    NOTE: The Zip® drive must be connected to a working power outlet in order for the printer pass-through feature to work.

    Windows® 95/98 Users—If you experience problems with your scanner or printer, refer to Printer Troubleshooting.


| top | home | previous | next |


Copyright © 2000
Iomega Corporation
All rights reserved