NetWare 4.10: Installing the Patches
This covers installing a bunch (but not all) of the available updates for NetWare 4.10. This covers most of Novells Minimum Patches they recommended you install, plus a few extras that look important and probably would have ended up in this list if Novell still cared about NetWare 4.1.
Contents
Tools
Things you'll need to complete this:
- A licensed install of NetWare 4.10
- The remote console server (remote.nlm and rspx.nlm) loaded on the server
- A Windows workstation that can login to the server
The Patches
We're going to be installing the following patches. Download all of these to your Windows workstation, and you may want to read over the readme files too before beginning. If you need to download these on an older machine with a more primitive web browser, you can find a more basic HTML page containing a table of all these patches (and more) here: http://ftp.zx.net.nz/pub/archive/novell/servers/4.10/readme.html
These patches mostly come in one of two forms:
- Copy a bunch of files into SYS:\SYSTEM, SYS:\SYSTEM\NLS\4 and perhaps also C:\NWSERVER, backing up the existing files if you want.
- Installed automatically via install.nlm (load install, product options, install a product not listed, point at the file from the patch)
| Date | Download | Readme | Notes |
| 1995-10-03 | INS224.EXE | Readme | INSTALL.NLM v2.24 |
| 1996-07-22 | SRVMN1.EXE | Readme | SERVMAN.NLM |
| 1997-01-16 | SMSUP6.EXE | Readme | SMS Functions Updated |
| 1998-05-22 | 410PT8B.EXE | Readme | NetWare 4.10 Patch Kit |
| 1998-09-23 | IPX660.EXE | Readme | IPX Upgrade for NetWare 3.1x, 4.1x |
| 1999-06-08 | NWPAUP1A.EXE | Readme | CDROM.NLM and supporting files |
| 1999-07-24 | ODI33G.EXE | Readme | ODI v 3.3 update files (G) |
| 1999-12-13 | DS410Q.EXE | Readme | Novell Directory Services |
| 1999-12-30 | STRTL8A.EXE | Readme | SPXS Update |
| 1999-08-25 | 410y2kp2.exe | Readme | NetWare 4.10 Year 2000 Fixes |
| 1999-12-08 | clibaux1.exe | Readme | Clibaux.nlm CLIB enhancement module |
| 2000-02-23 | libupj4.exe | Readme | Updated CLIB and DSAPI v4.11r libraries |
| 2000-06-06 | nam41d.exe | Readme | NAM41c.EXE; MAC.NAM, OS2.NAM for NW 4.10 |
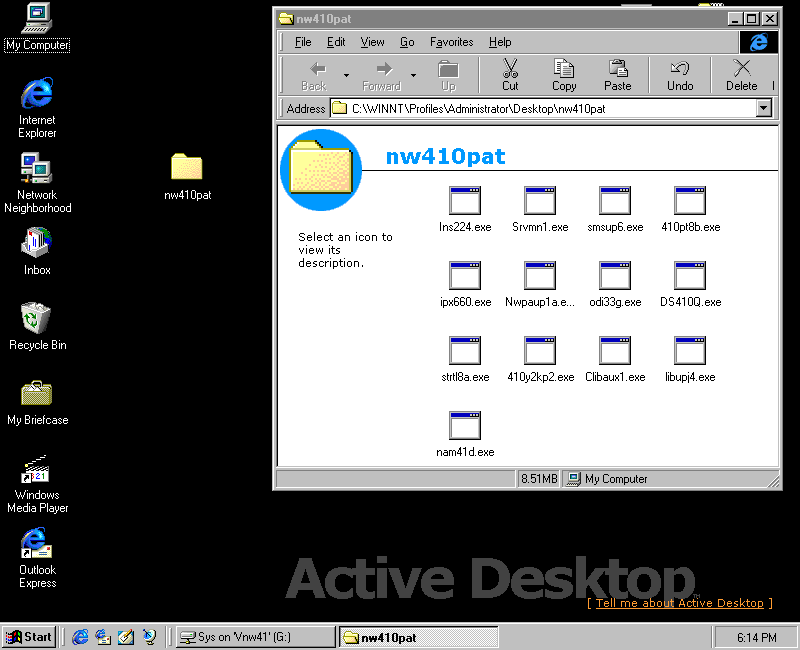
I'm doing this on a Windows NT 4.0 VM where I've mapped drive G: to the SYS volume on my NetWare 4.10 server (VNW41), and I've downloaded all of the
patches I'm going to be applying
INS224: INSTALL.NLM v2.24
| Date | Download | Readme | Notes |
| 1995-10-03 | INS224.EXE | Readme | INSTALL.NLM v2.24 |
This one just fixes a bunch of bugs in install.nlm. The process is trivial: Run the self-extracting EXE and copy the new version of install.nlm over the top of the old one (in SYS:\SYSTEM) taking a backup first if you like.
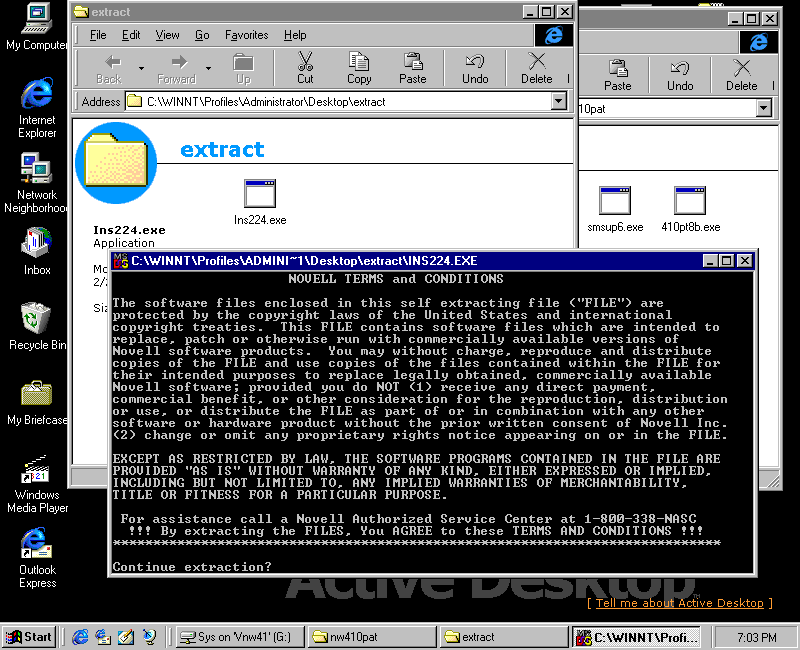
Copy INS224.EXE to a folder and run it to extract the files typing 'y' and hitting enter at the prompt
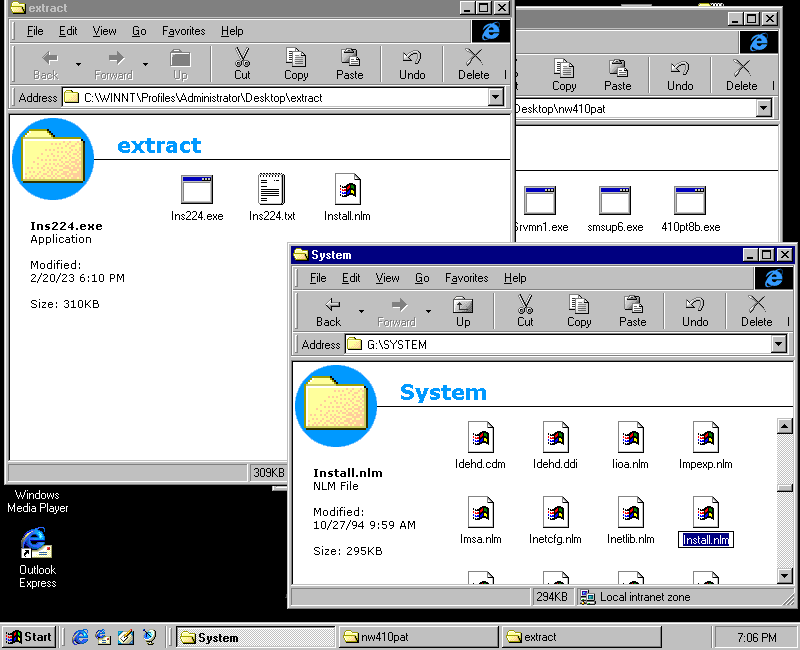
Optional: Rename SYS:\SYSTEM\INSTALL.NLM to INSTALL.OLD
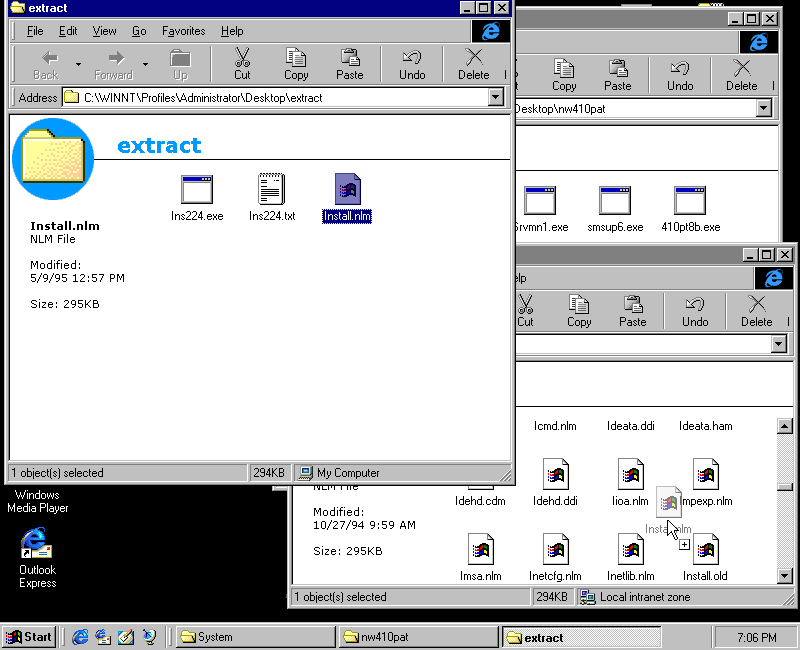
Copy the new install.nlm into SYS:\SYSTEM
You can now delete everything in the directory you extracted the patch to, ready for the next one.
SRVMN1: SERVMAN.NLM (1996-04-18)
| Date | Download | Readme | Notes |
| 1996-07-22 | SRVMN1.EXE | Readme | SERVMAN.NLM |
This one just fixes some problems with SERVMAN.NLM - probably not terribly important
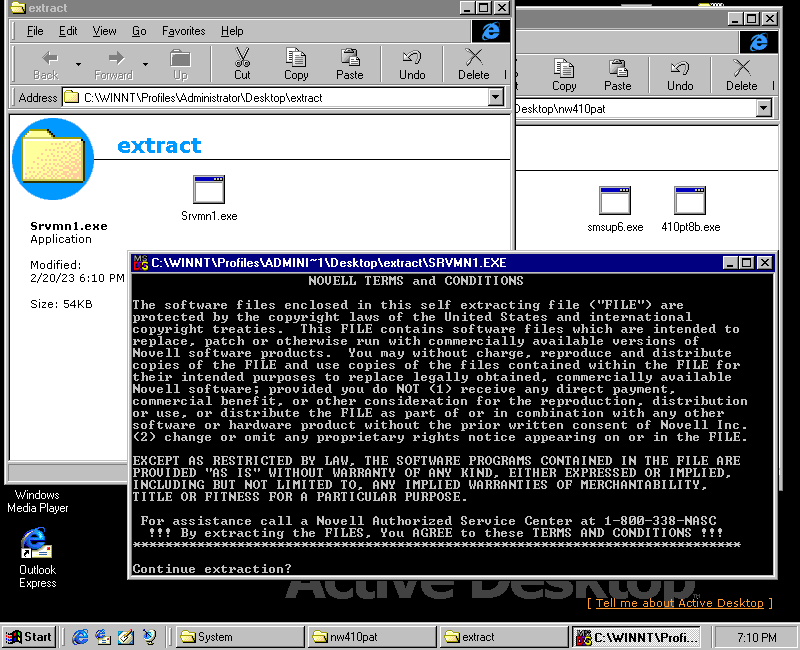
Copy SRVMN1.EXE to a folder and run it to extract the files typing 'y' and hitting enter at the prompt
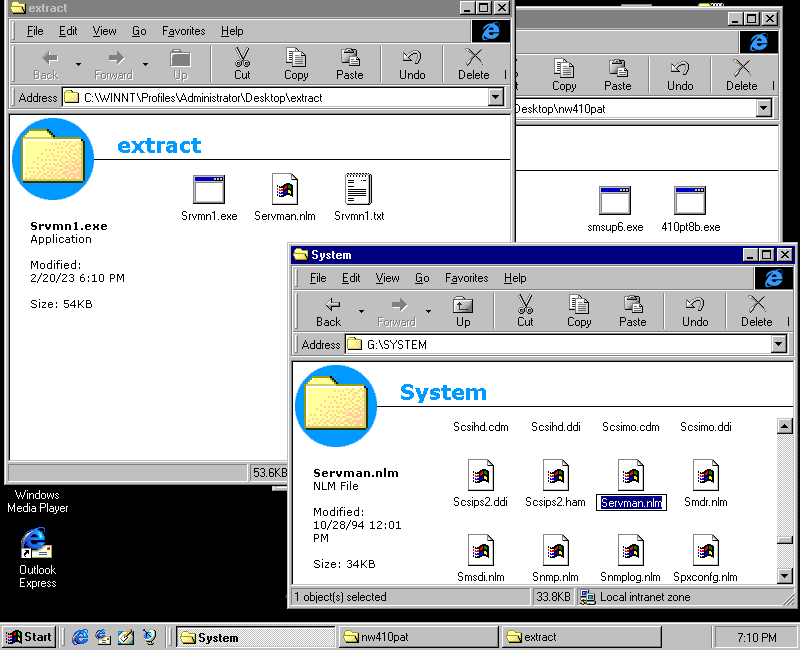
Optional: Rename SYS:\SYSTEM\SERVMAN.NLM to SERVMAN.OLD
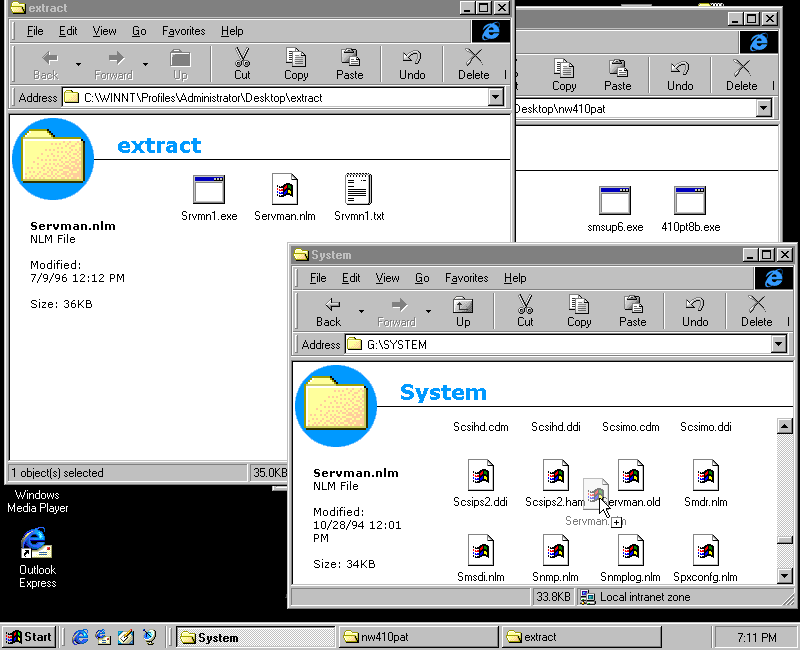
Copy the new servman.nlm into SYS:\SYSTEM
You can now delete everything in the directory you extracted the patch to, ready for the next one.
SMSUP6: SMS Functions Updated
| Date | Download | Readme | Notes |
| 1997-01-16 | SMSUP6.EXE | Readme | SMS Functions Updated |
This one just updates a bunch of TSA backup stuff - probably not very important unless you plan to use that feature.
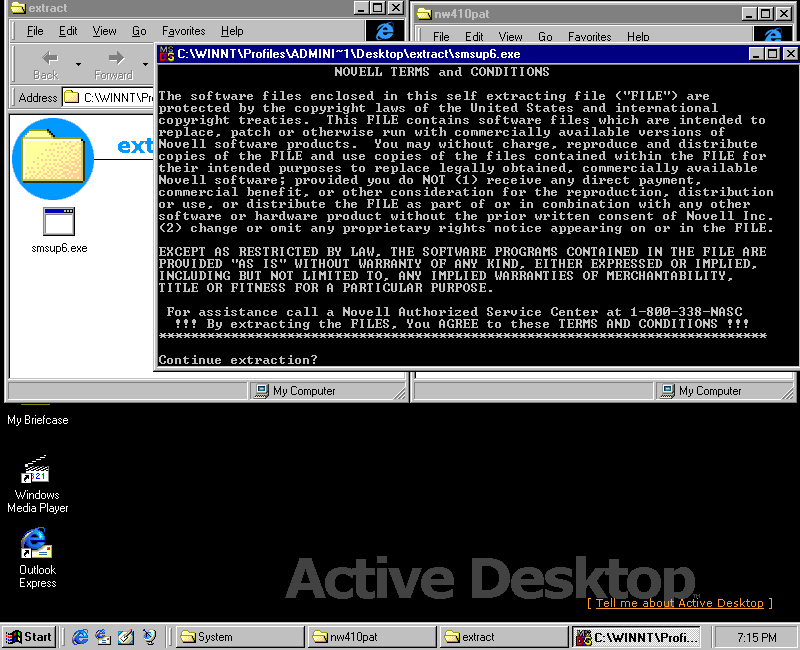
Copy SMSUP6.EXE to a folder and run it to extract the files typing 'y' and hitting enter at the prompt
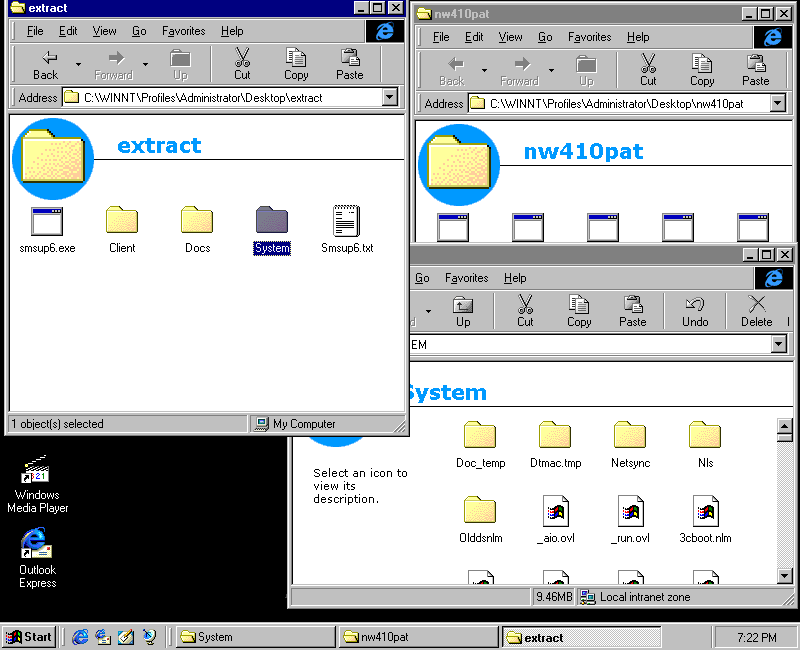
This patch extracted a few more things! All the stuff we care about is in the system folder, though the documentation
in the docs folder might be worth a look - perhaps copy it somewhere for future reference
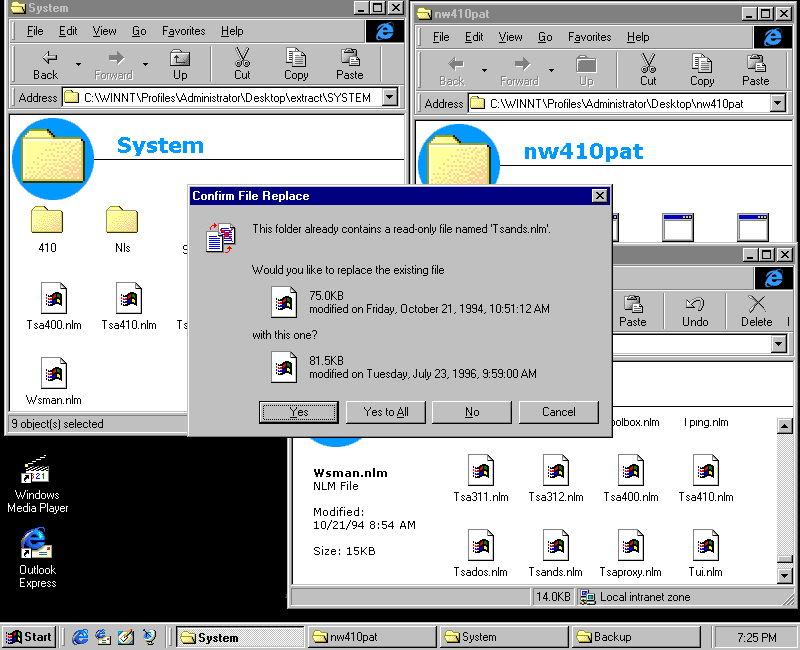
Copy the .NLM files in the extracted SYSTEM folder over to SYS:\SYSTEM, replacing any files that already exist. You
may want to take backups of the files being replaced
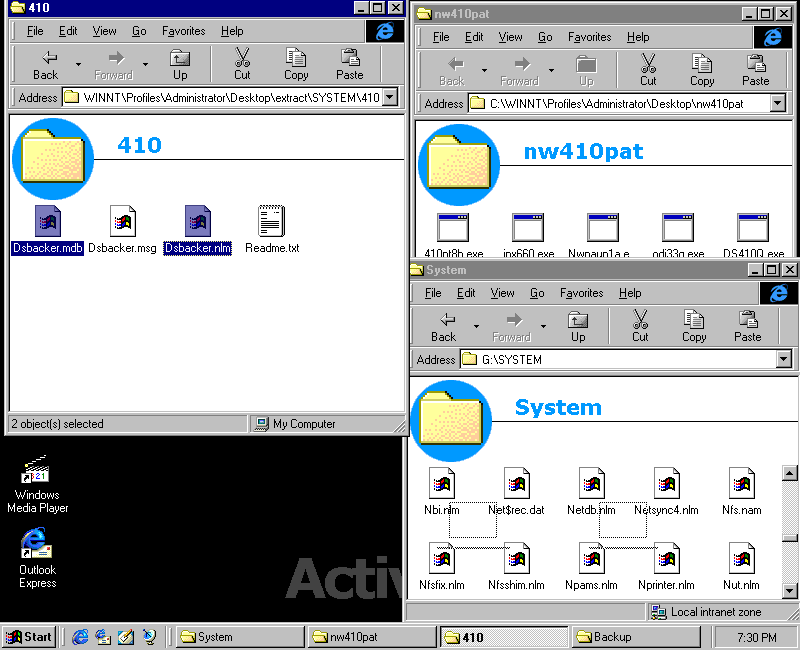
Also copy over the DSBACKER.MDB and DSBACKER.NLM files in the 410 subdirectory to SYS:\SYSTEM - these files don't ship
with NetWare 4.10 so there is nothing to backup.
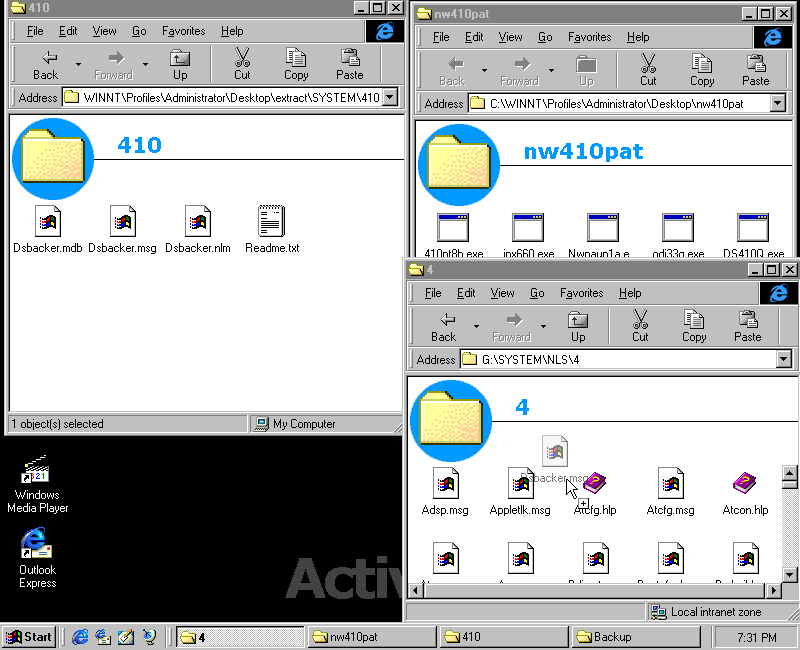
And copy over DSBACKER.MSG to SYS:\SYSTEM\NLS\4
Lastly, we need to copy over all of the files in SYSTEM\NLS\4 to to SYS:\SYSTEM\NLS\4
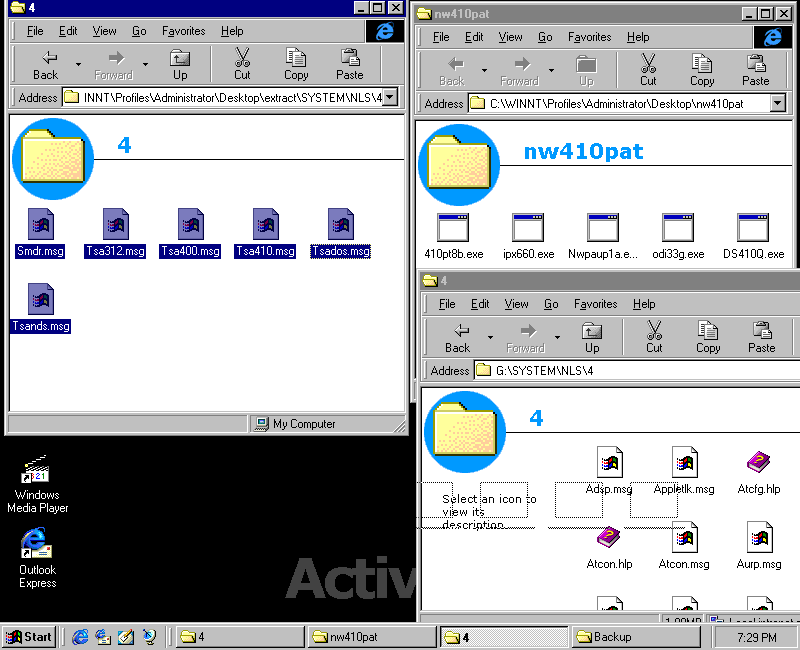
You can now delete everything in the directory you extracted the patch to, ready for the next one.
410PT8B: NetWare 4.10 Patch Kit
| Date | Download | Readme | Notes |
| 1998-05-22 | 410PT8B.EXE | Readme | NetWare 4.10 Patch Kit |
This is a general patch kit (like a service pack) which includes a pile of updates. Its the first of a few updates that will be installed using INSTALL.NLM.
Create the folder 410pt8b on the SYS: volume (SYS:\410PT8B), copy 410PT8B.EXE to that folder,
and run it to extract the files typing 'y' and hitting enter at the prompt
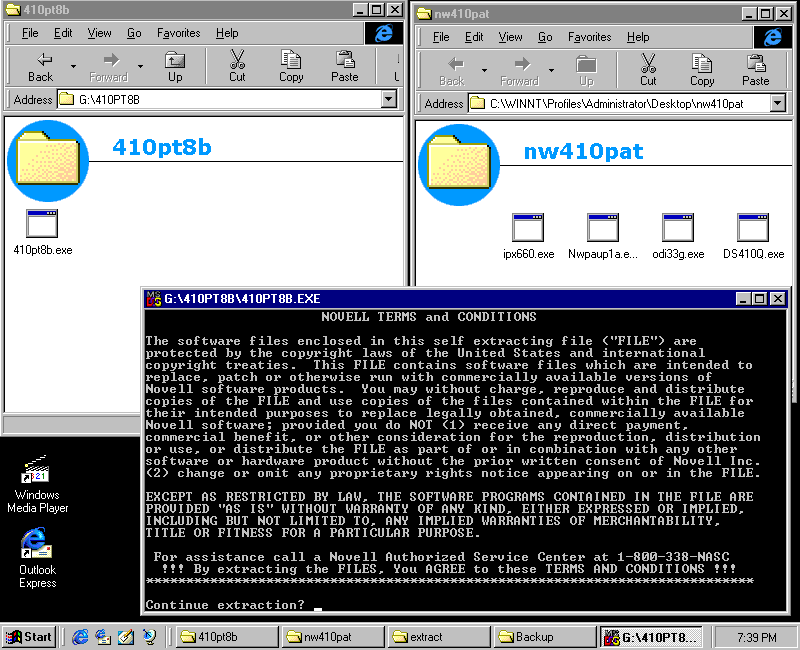
It may take a little while to expand as there are a lot of files
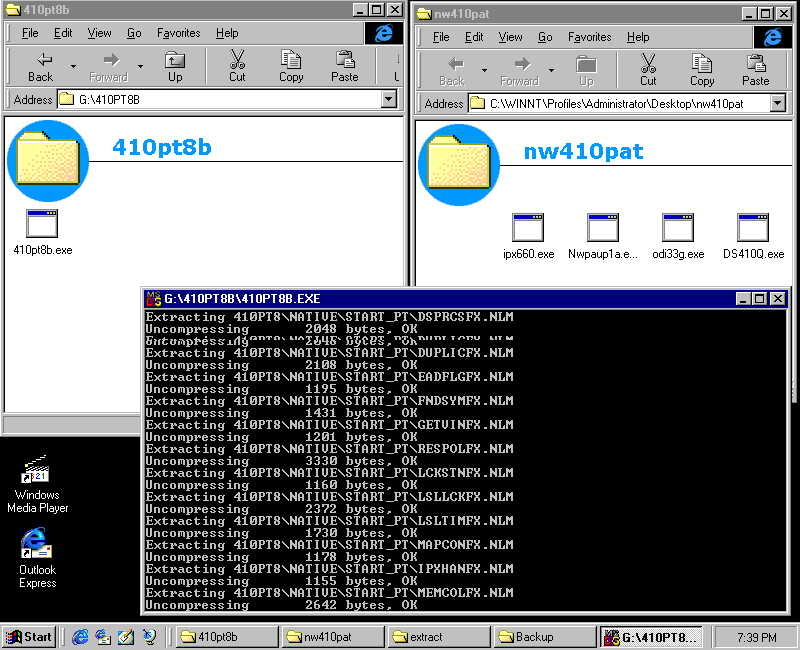
Finished extracting!
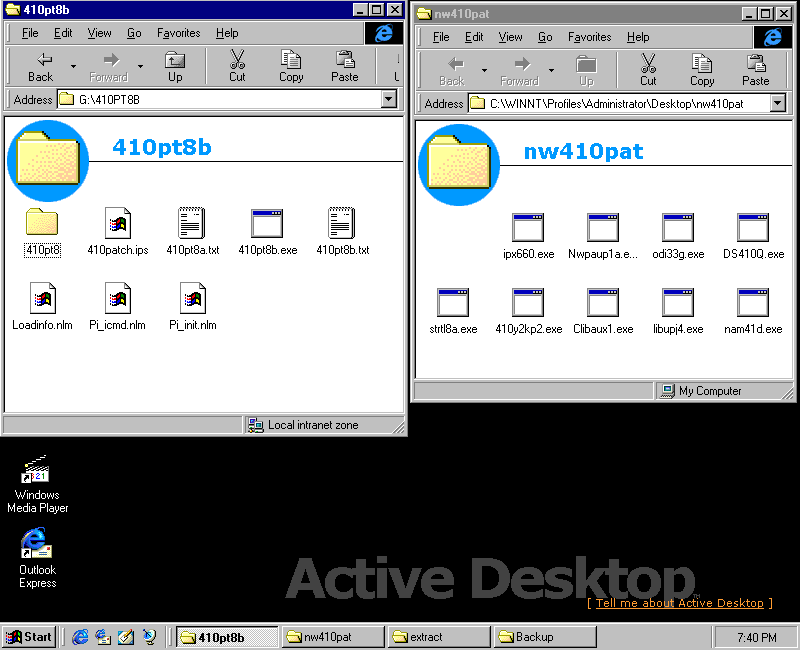
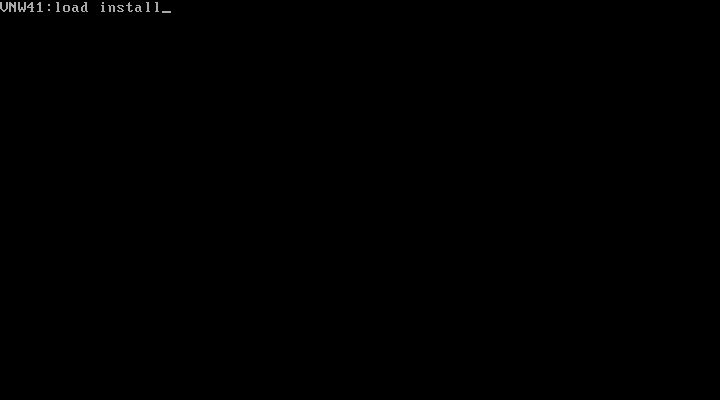
From the server console, run load install
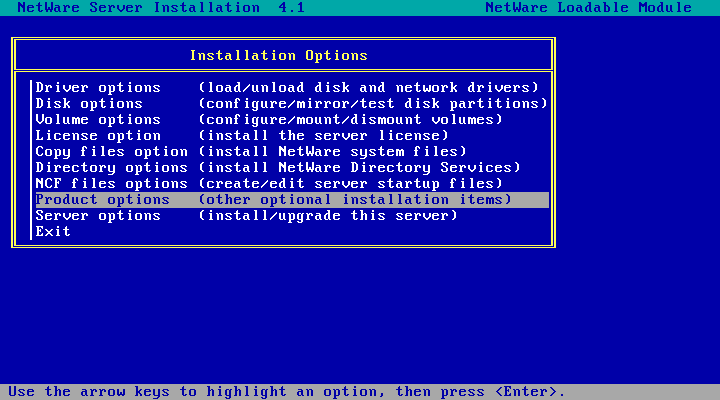
Choose Product options
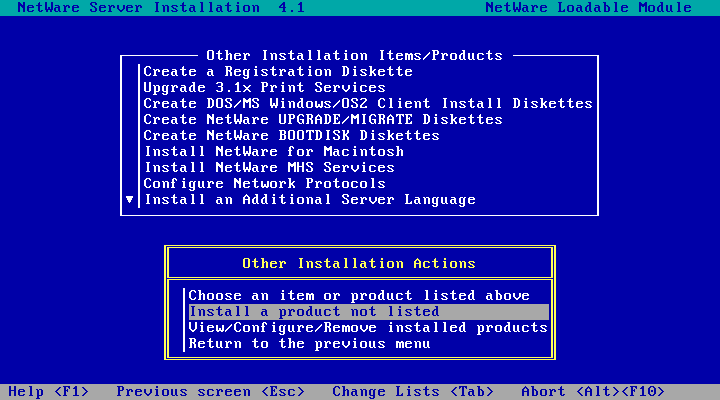
Choose Install a product not listed
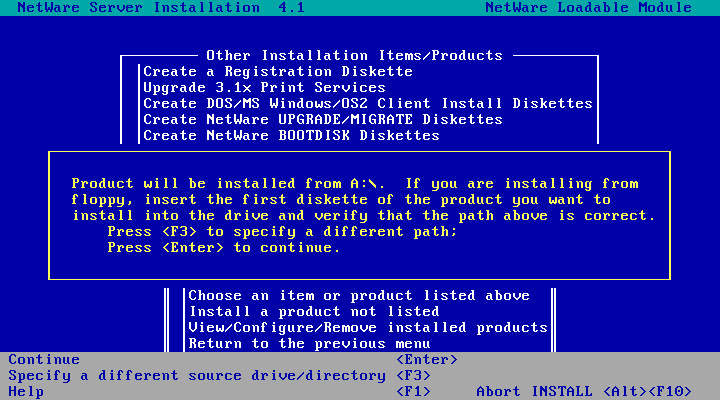
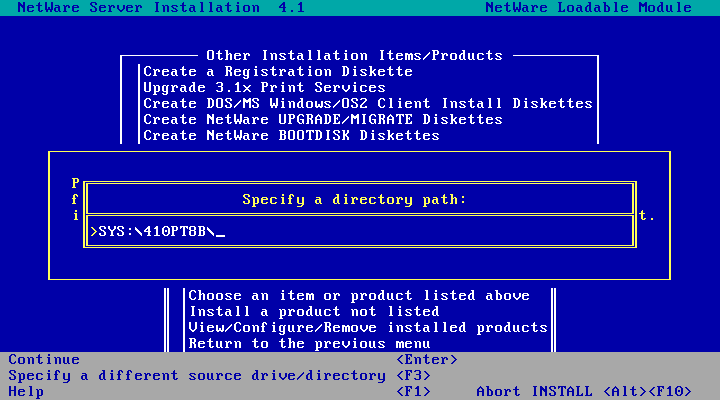
Press F3 to specify a different path
Enter SYS:\410PT8B\ and hit enter to continue
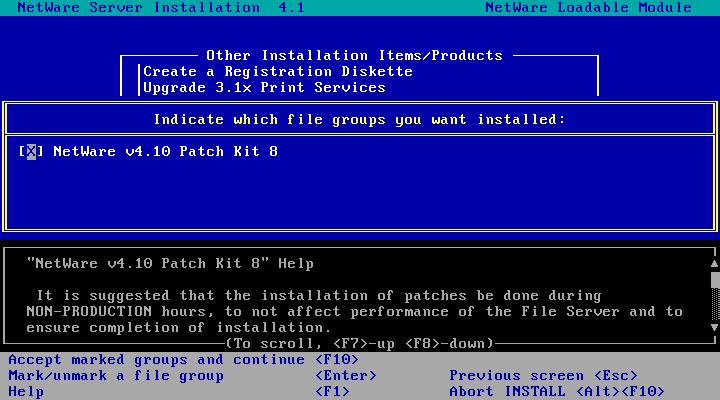
Press F10 to accept the marked file groups and continue
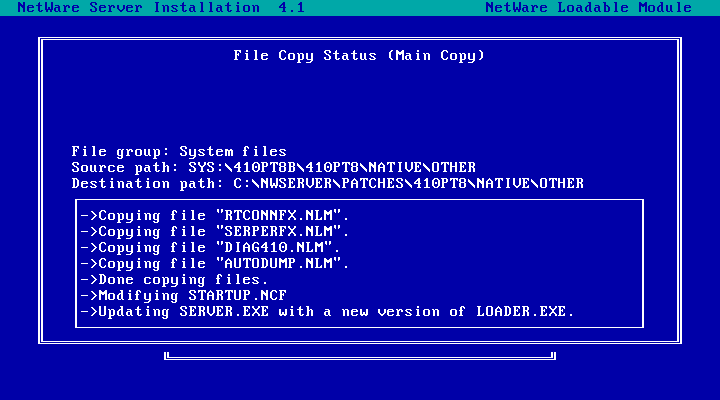
And the patch installs!
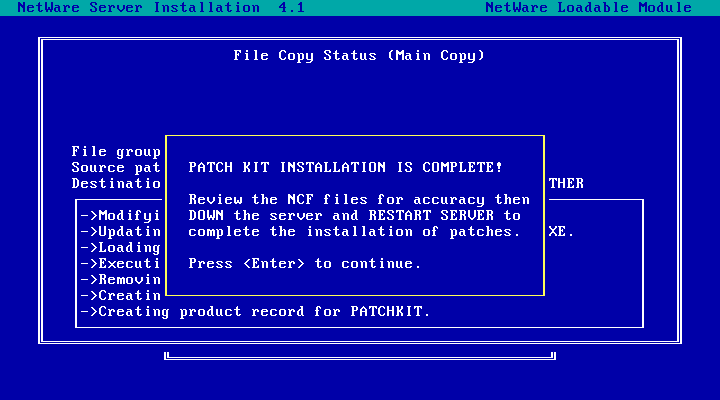
Patch is installed successfully. Press Enter to continue.
Choose Return to the previous menu, then choose Exit to exit INSTALL.NLM.
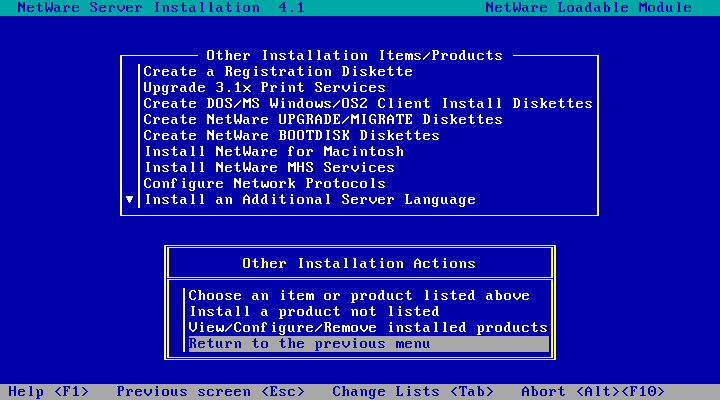
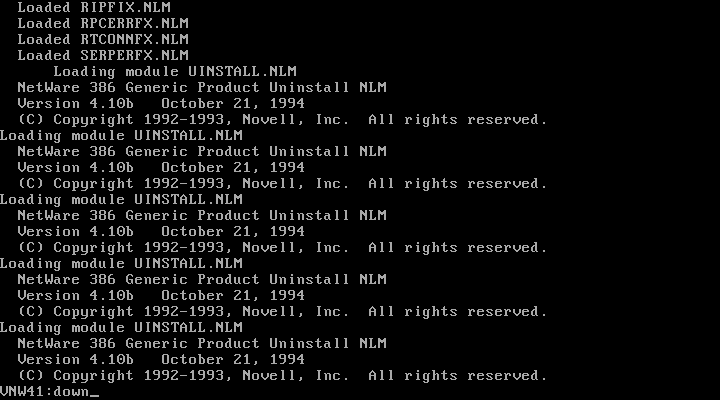
DOWN the server, EXIT to DOS and reboot.
Once the server has rebooted, if you run load install, choose Product options, then
View/Configure/Remove installed products you'll see the patch kit listed as installed:
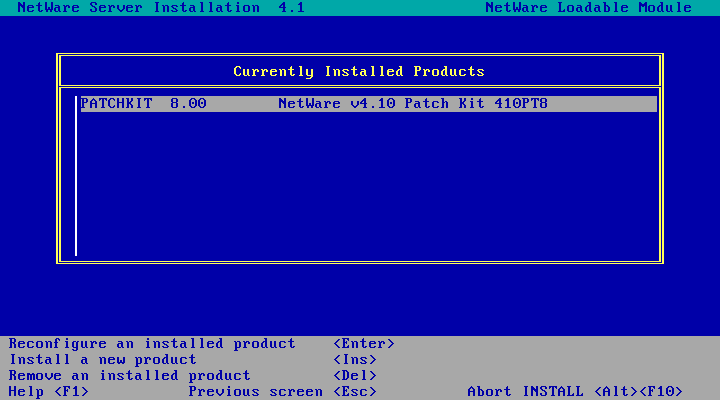
Press Esc three times and choose Yes to exit back to the server console. You can now delete the SYS:\410PT8B folder you created earlier.
IPX660: IPX Upgrade for NetWare 3.1x, 4.1x
| Date | Download | Readme | Notes |
| 1998-09-23 | IPX660.EXE | Readme | IPX Upgrade for NetWare 3.1x, 4.1x |
Create the folder ipx660 on the SYS: volume (SYS:\IPX660), copy IPX660.EXE to that folder,
and run it to extract the files typing 'y' and hitting enter at the prompt
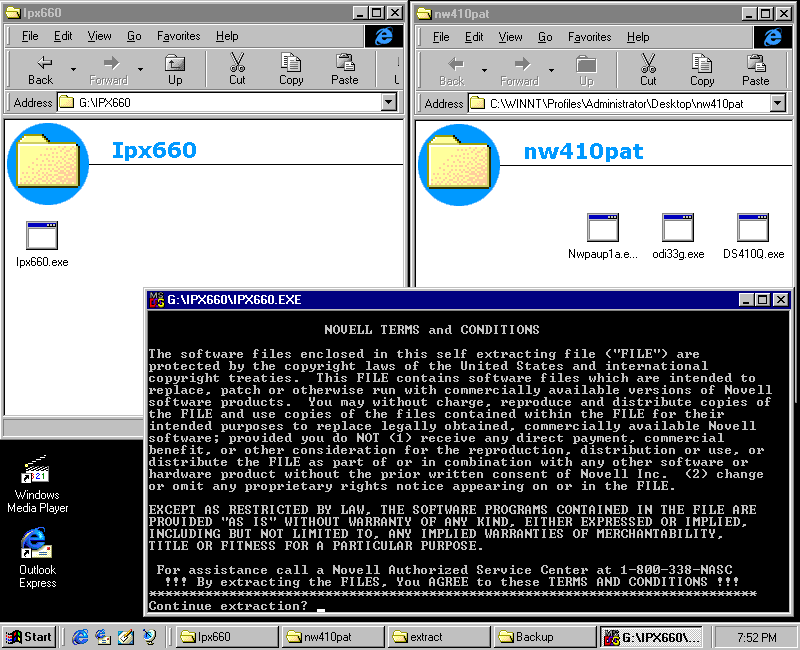
It may take a little while to expand as there are a lot of files
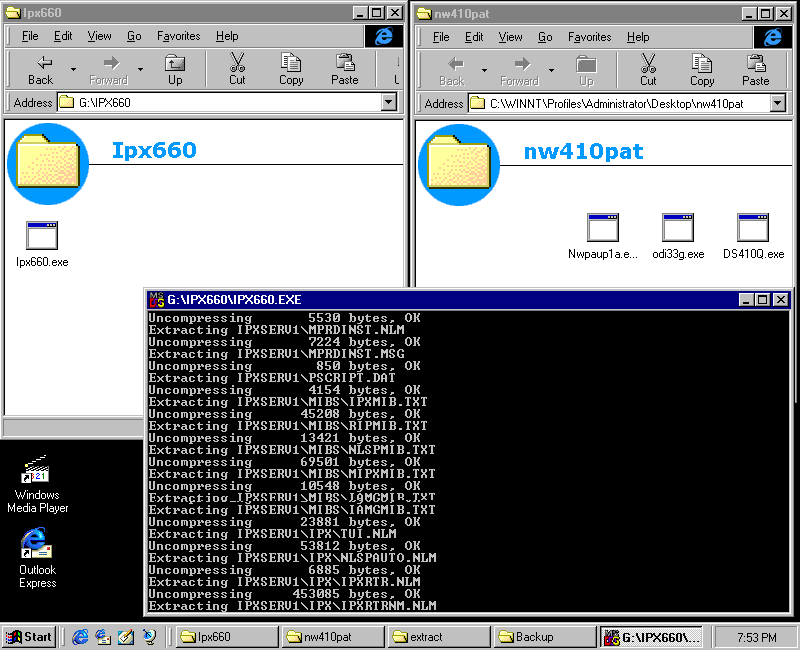
Finished extracting!
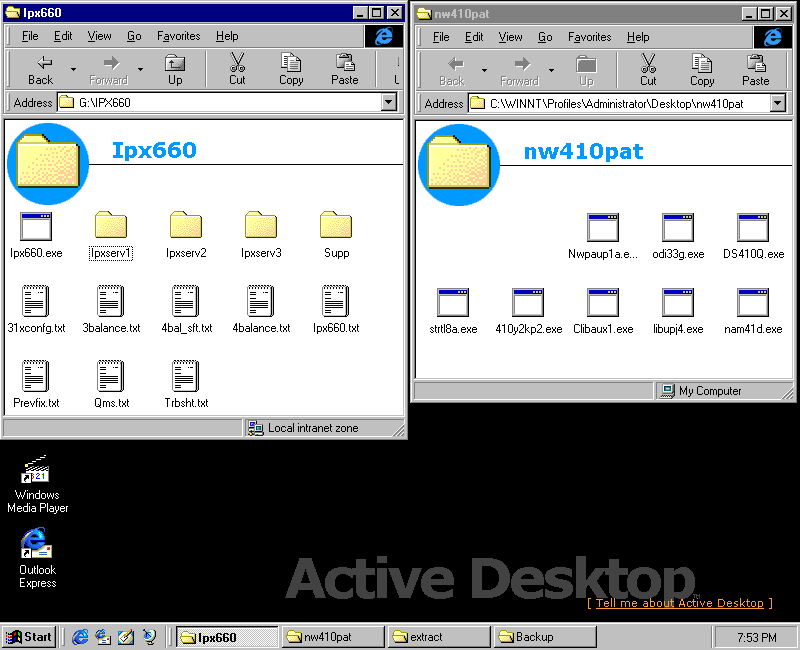
From the server console, run load install

Choose Product options

Choose Install a product not listed

Press F3 to specify a different path

Enter SYS:\IPX660\IPXSERV1 and hit enter to continue
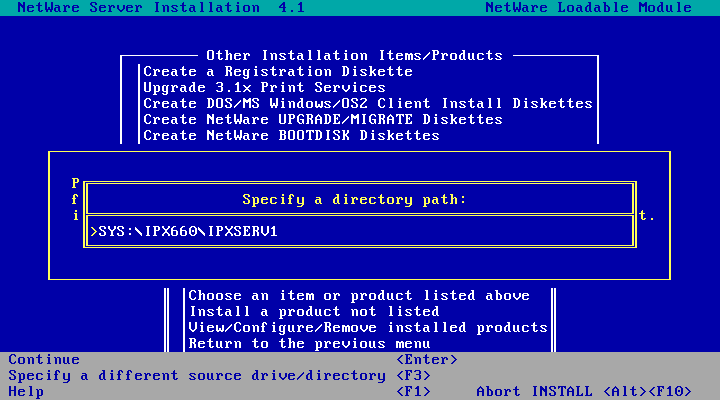
And the patch installs!
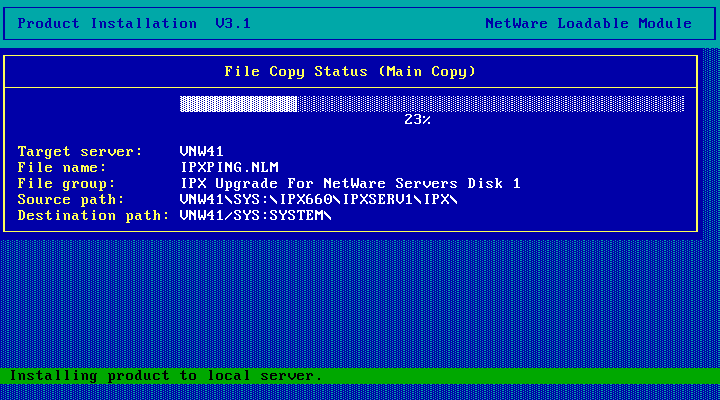
Once its finished you'll be dumped back at the Other Installation Actions menu. Choose the
View/Configure/Remove installed products option to confirm it was installed
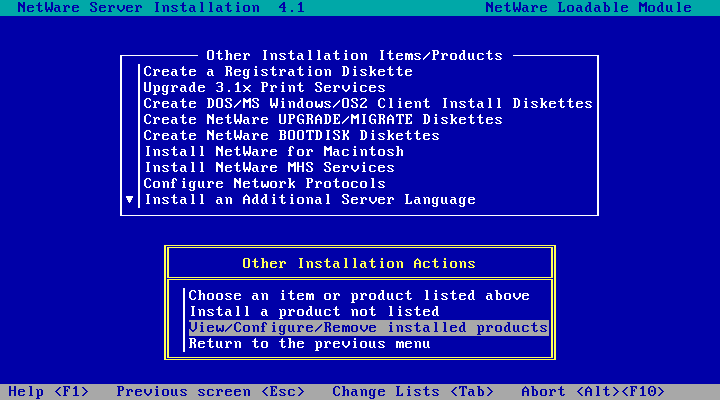
And there it is in the list - IPXRTR. Press Esc three times and choose Yes to exit back to the server console.
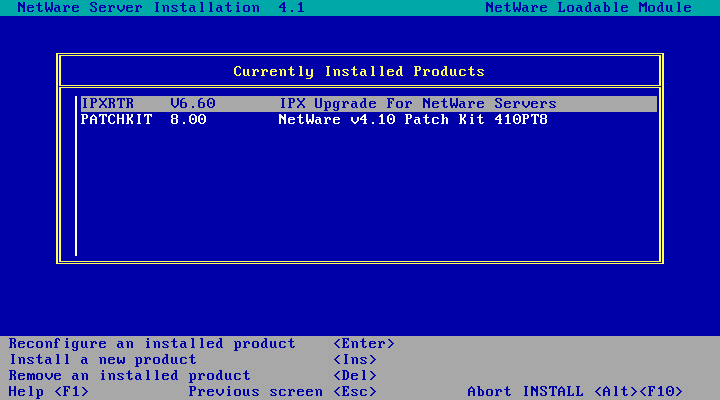
Press Esc three times and choose Yes to exit back to the server console. You can now delete the SYS:\IPX660 folder you created earlier.
NWPAUP1A: CDROM.NLM and supporting files
| Date | Download | Readme | Notes |
| 1999-06-08 | NWPAUP1A.EXE | Readme | CDROM.NLM and supporting files |
This one updates disk drivers and should allow NetWare 4.10 to talk to the IDE CD-ROM drive KVM/QEMU provides. Its a bit painful to install though as it involves copying files to C. Your options for doing that are:
- Copy the files to a floppy disk, down the server, and copy everything over to C: from DOS
- Copy the files to SYS volume, then use toolbox.nlm the server console to copy everything over to C:
- Use RConsole to copy the files one at a time directly to the servers C:
I'm going with the second option - toolbox.nlm. If you don't already have it on your server, grab TBOX7.EXE, extract it, copy TOOLBOX.NLM over to SYS:\SYSTEM and run load toolbox.nlm. You may also want to add toolbox.nlm to your autoexec.ncf as its pretty handy.
Create the folder nwpaup1a on the SYS: volume (SYS:\NWPAUP1A), copy NWPAUP1A.EXE to that folder,
and run it to extract the files typing 'y' and hitting enter at the prompt
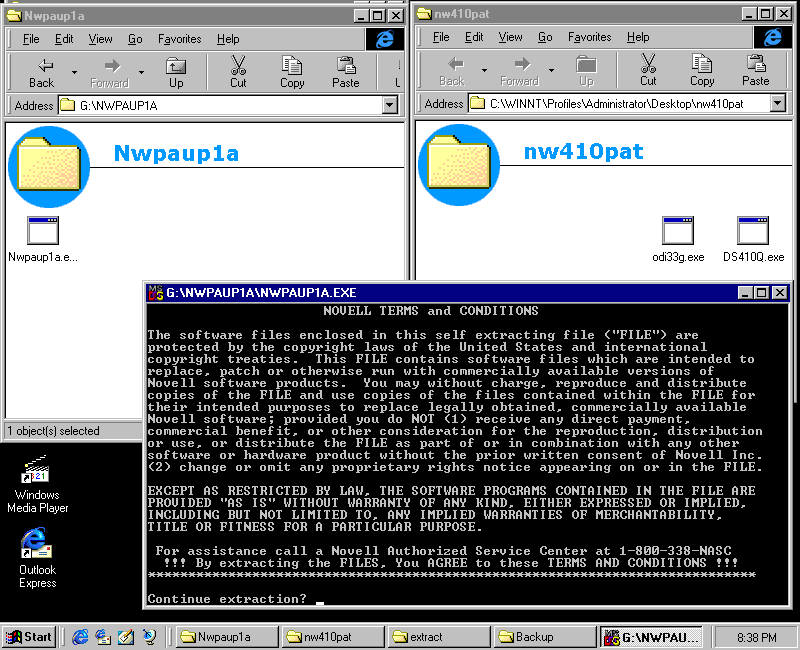
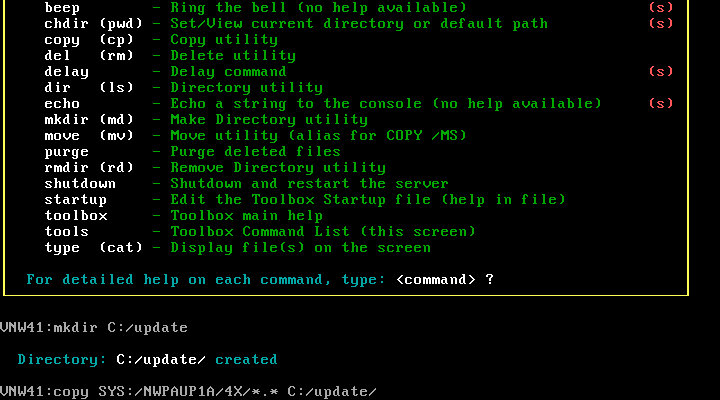
Run mkdir C:/update
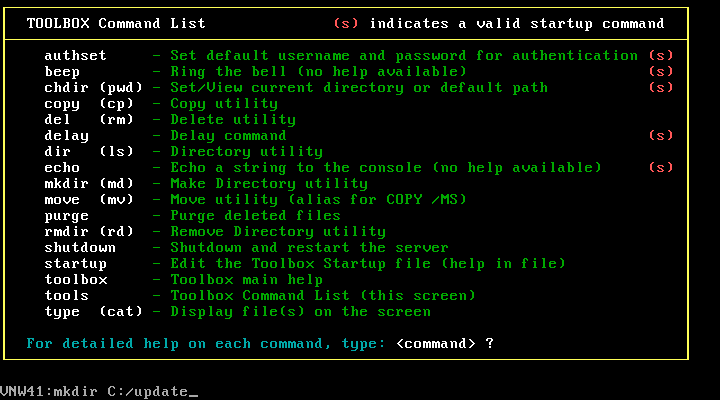
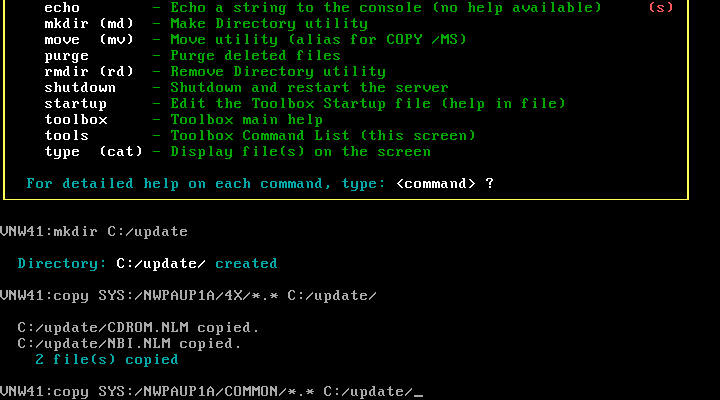
Run copy SYS:/NWPAUP1A/4X/*.* C:/update/
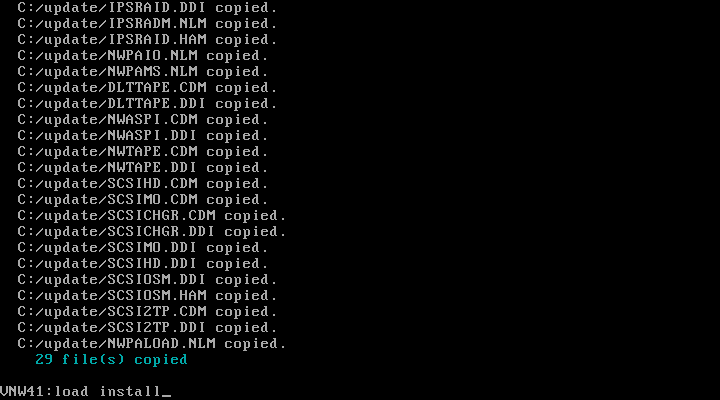
run copy SYS:/NWPAUP1A/common/*.* C:/update/
Run load install
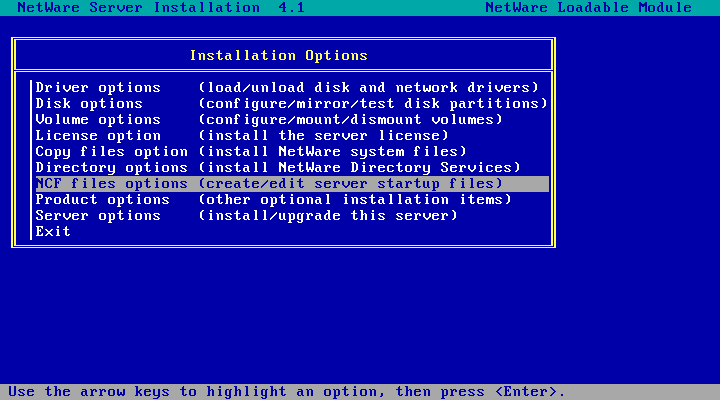
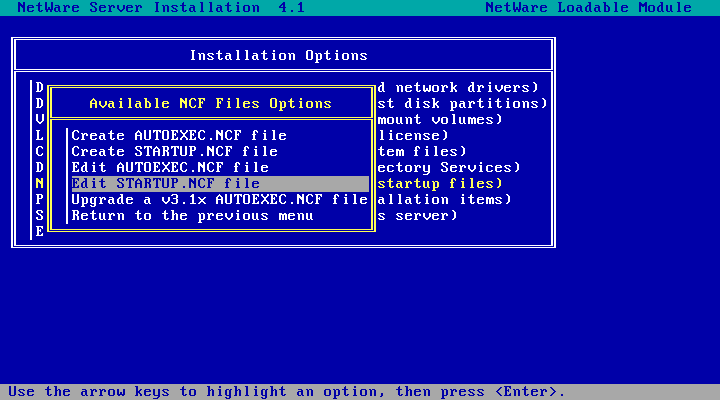
Choose NCF files options
Choose Edit STARTUP.NCF file
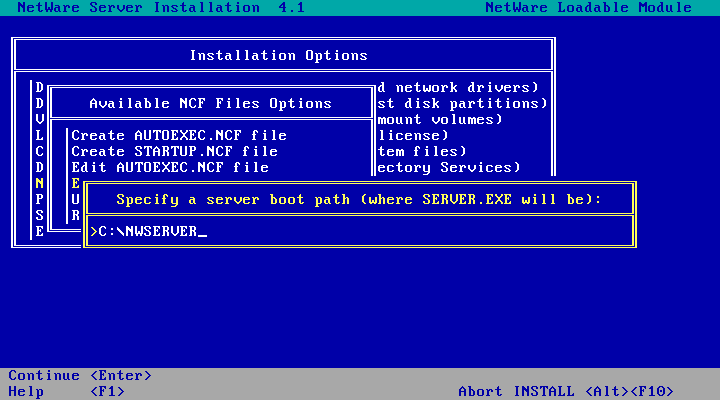
And hit enter to accept the default path
And here is STARTUP.NCF before modification.
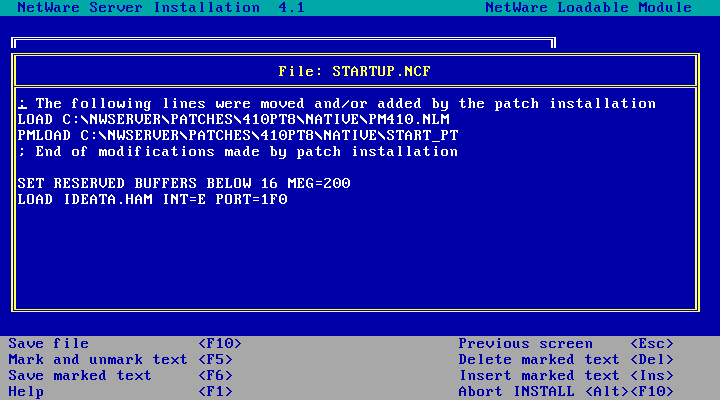
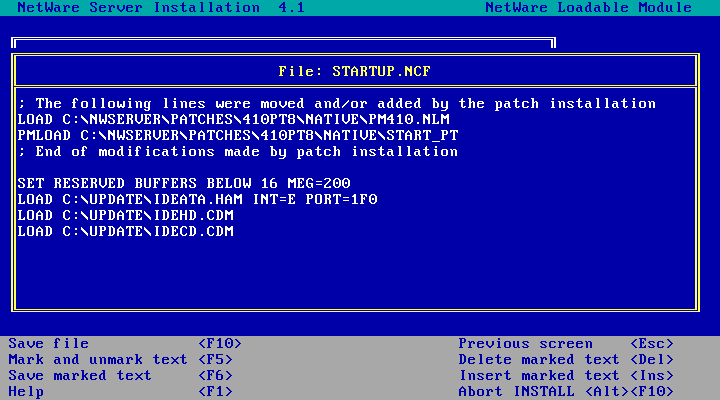
Alter the LOAD IDEATA.HAM INT=E PORT=1F0 line to be LOAD C:\UPDATE\IDEATA.HAM INT=E PORT=1F0
and add in two new lines: LOAD C:\UPDATE\IDEHD.CDM and LOAD C:\UPDATE\IDECD.CDM. When done, hit F10
and choose Yes to save STARTUP.NCF.
Then choose the Edit AUTOEXEC.NCF file option
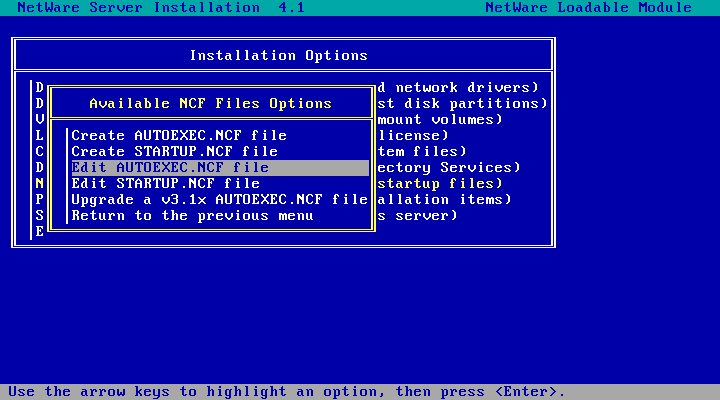
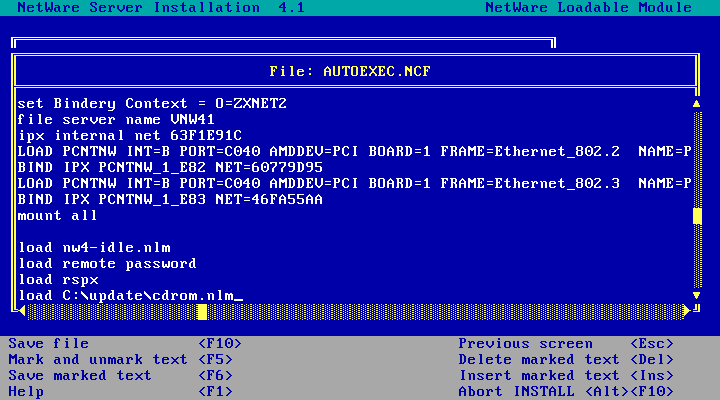
And add a new line to the end of this file: load C:\update\cdrom.nlm. Hit F10 and choose Yes
to save AUTOEXEC.NCF
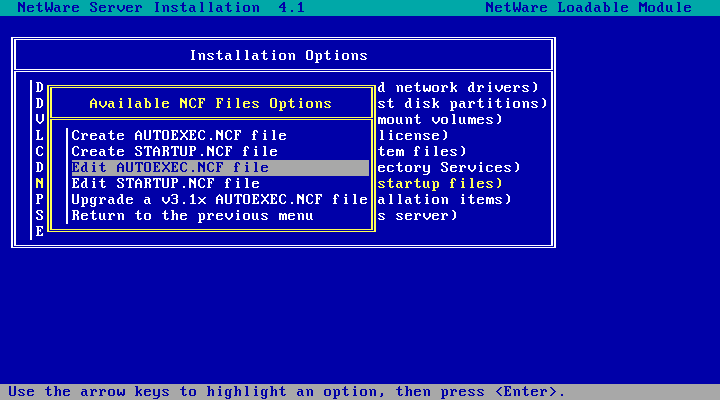
Hit Esc twice and choose Yes to exit INSTALL.NLM
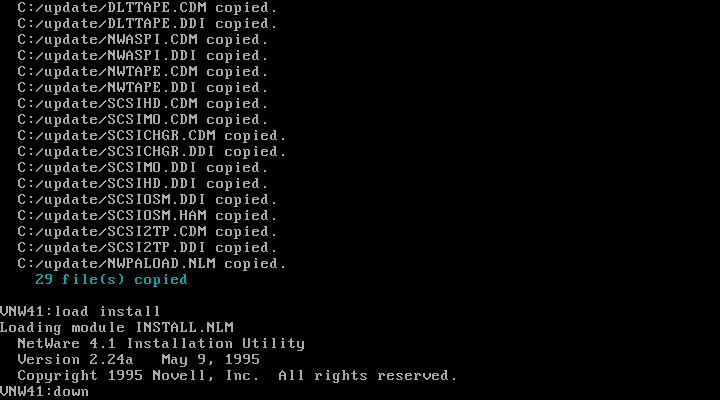
DOWN the server, and EXIT to DOS, then reboot the server. On reboot you should see the new .CDM
files load along with CDROM.NLM - you now have IDE CD-ROM drive support inside NetWare 4.10!
You can now delete SYS:\NWPAUP1A. Next time you're in DOS you can also comment out or remove the DOS CD-ROM driver from CONFIG.SYS and MSCDEX.EXE from AUTOEXEC.BAT to reduce server startup time. They're not needed anymore now that NetWare can talk to the CD-ROM drive itself.
ODI33G: ODI v 3.3 update files (G)
| Date | Download | Readme | Notes |
| 1999-07-24 | ODI33G.EXE | Readme | ODI v 3.3 update files (G) |
We installed bits of this at the time we installed NetWare 4.10 in order to get the PCnet driver to work. Now its time to install this update properly.
Create the folder odi33 on the SYS: volume (SYS:\ODI33), copy ODI33G.EXE to that folder,
and run it to extract the files typing 'y' and hitting enter at the prompt
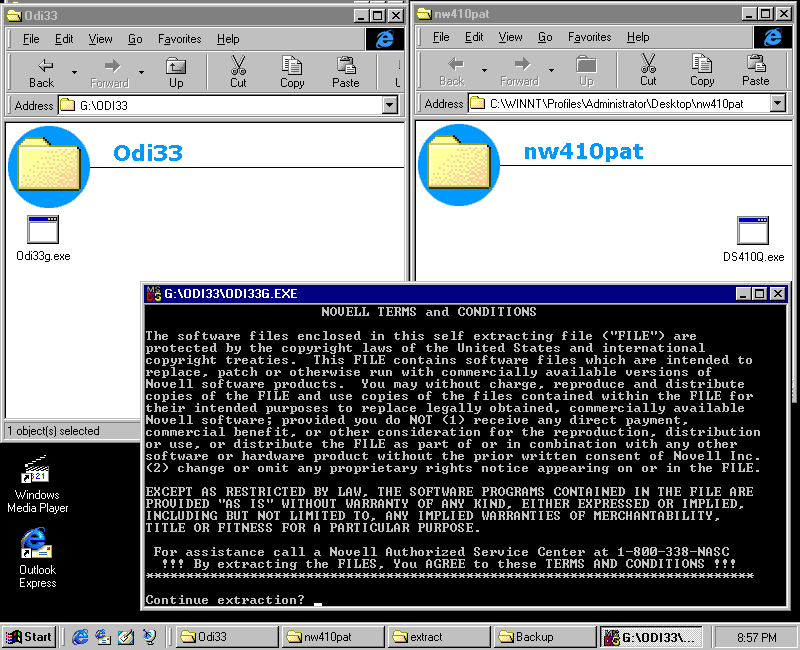
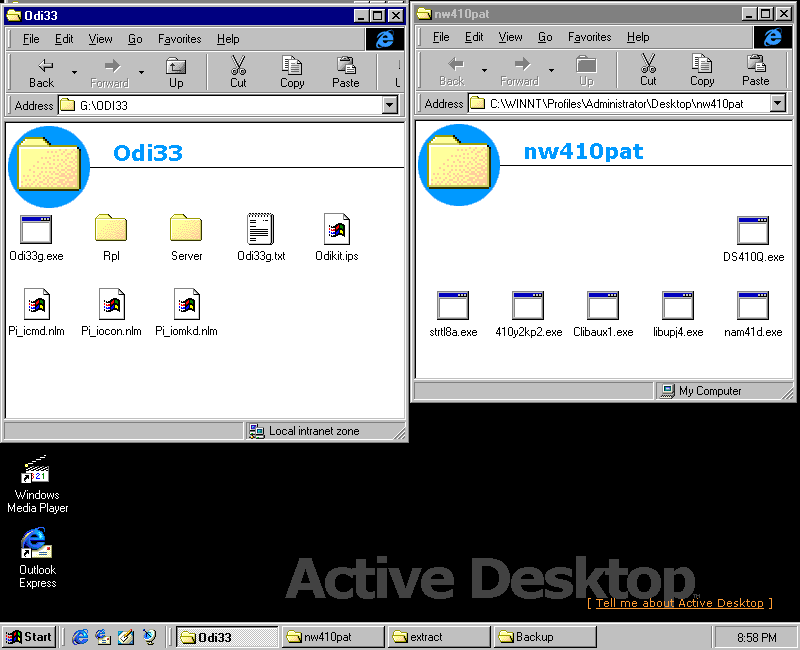
Finished extracting!
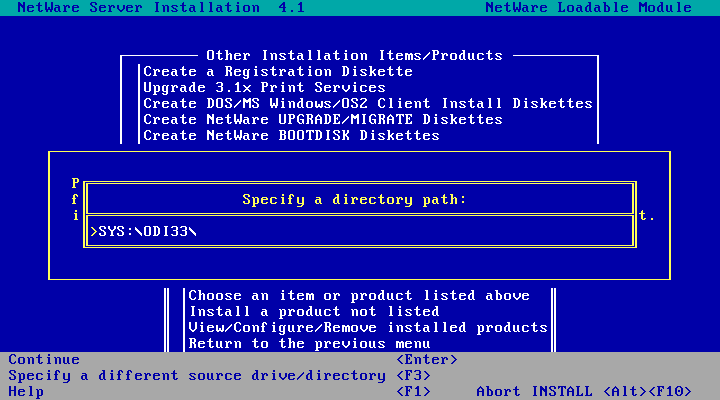
From the server console, run load install

Choose Product options

Choose Install a product not listed

Press F3 to specify a different path

Enter SYS:\ODI33\ and hit enter to continue
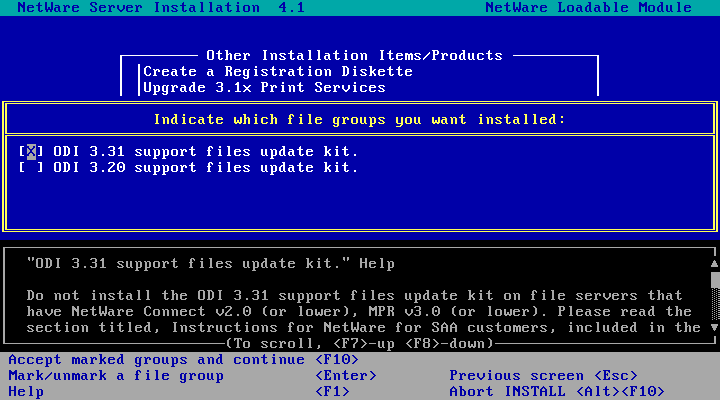
Hit F10 to accept the marked groups and continue
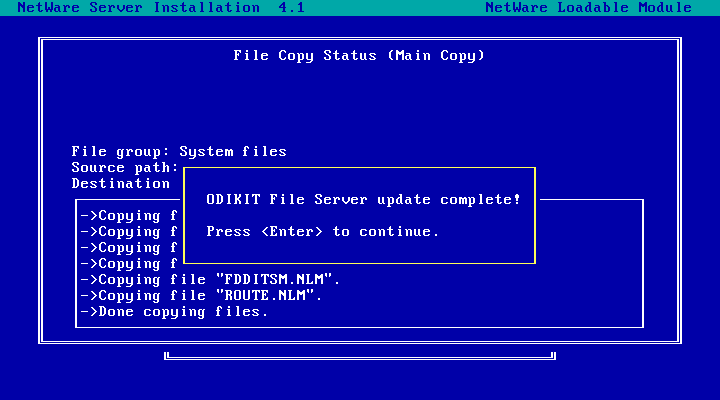
A few files are copied, then we're done! Hit enter.
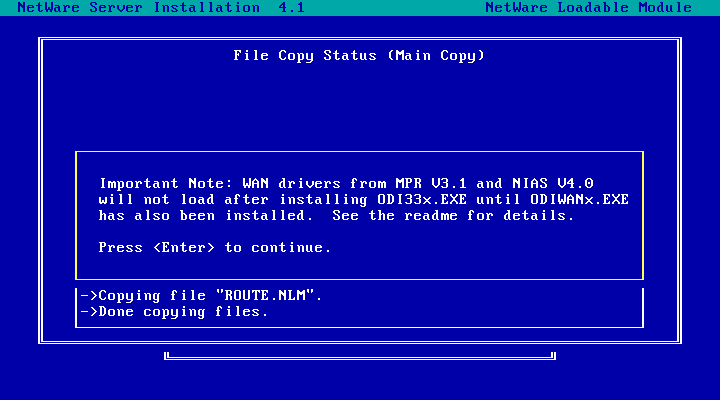
In the unlikely event you're using WAN drivers for something, you'll
have to go figure out how to apply ODIWANx.EXE next. Hit enter to continue.
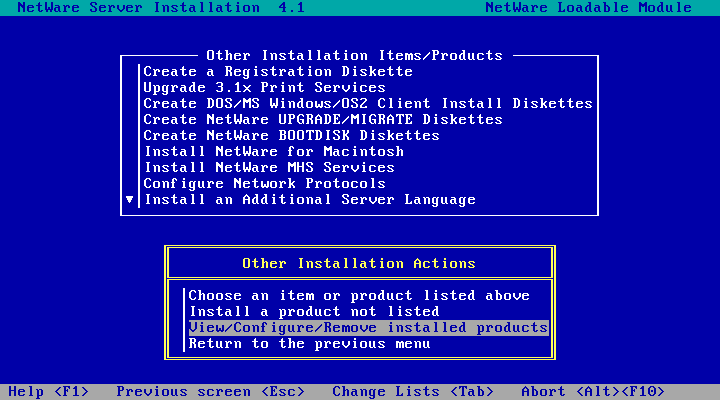
Back at the menu. Select View/Configure/Remove installed products.
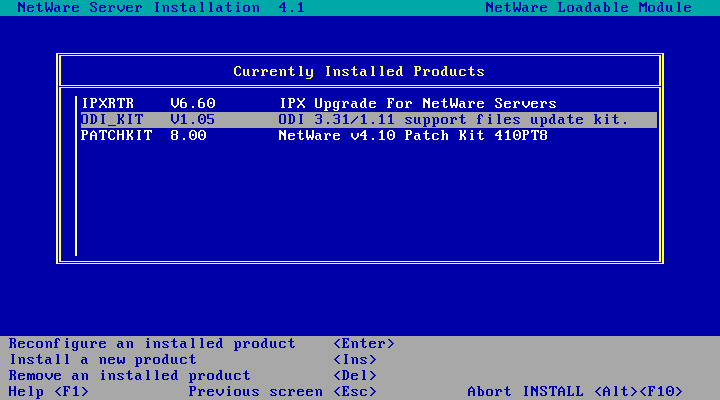
And there is the ODI update!
Hit Esc three times and choose Yes to exit INSTALL.NLM. You can now delete SYS:\ODI33.
DS410Q: Novell Directory Services
| Date | Download | Readme | Notes |
| 1999-12-13 | DS410Q.EXE | Readme | Novell Directory Services |
This update makes NDS on NetWare 4.10 compatbile with the versions of NDS on NetWare 4.11, 4.2 and 5.0. Important if you want NetWare 4.10 to coexist with newer versions in the same NDS tree.
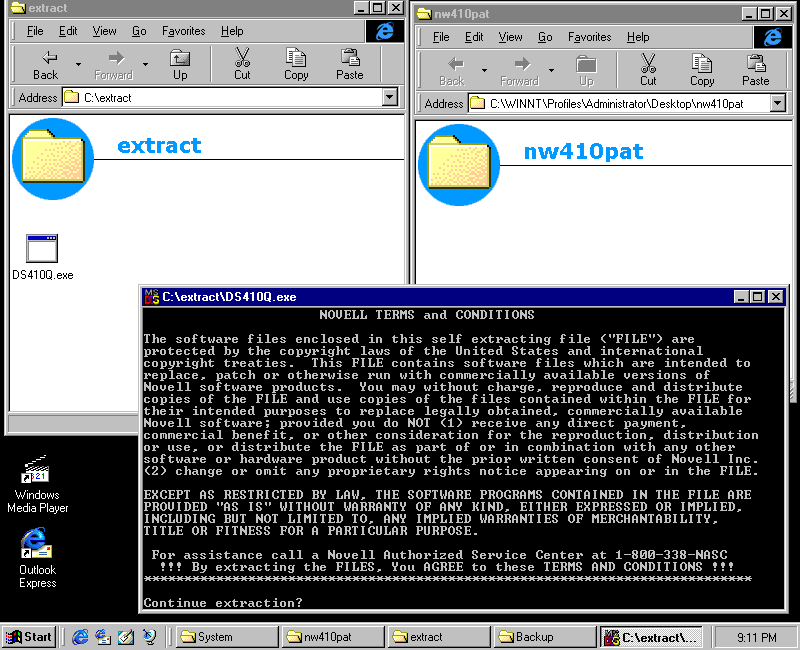
Copy DS410Q.EXE to a folder and run it to extract the files typing 'y' and hitting enter at the prompt
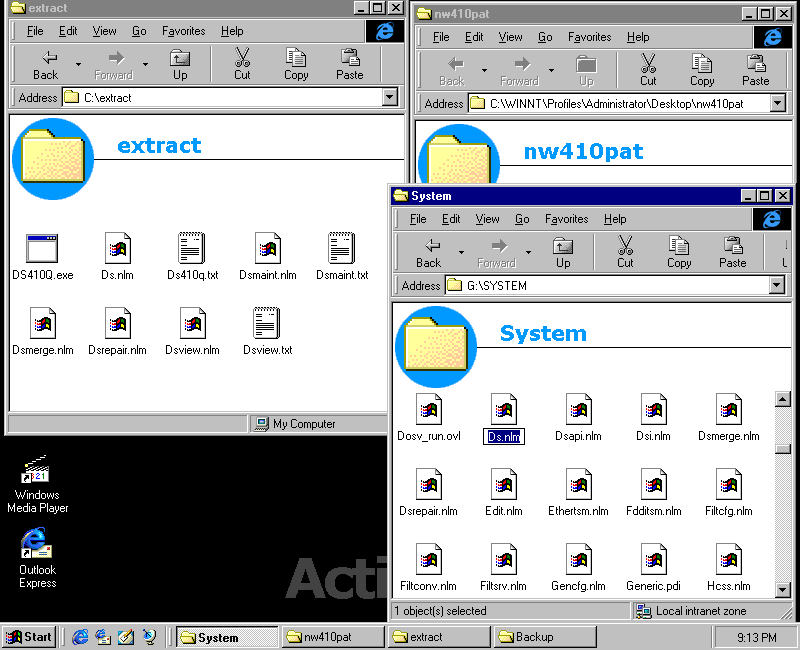
Backup the following files in SYS:\SYSTEM (if they exist) by renaming them to the .OLD extension: DS.NLM,
DSREPAIR.NLM, DSMERGE.NLM, DSMAINT.NLM
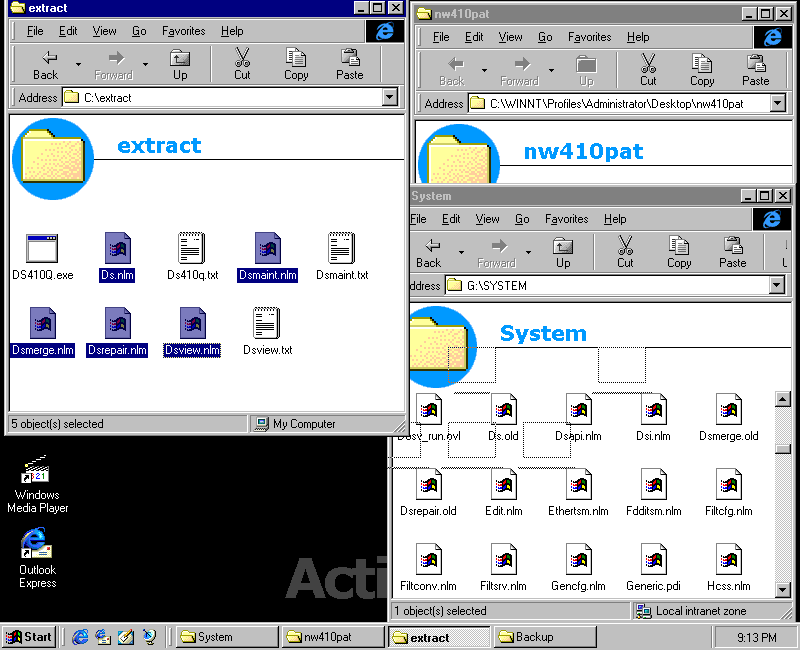
Then copy the new .nlm files included in the patch over to SYS:\SYSTEM
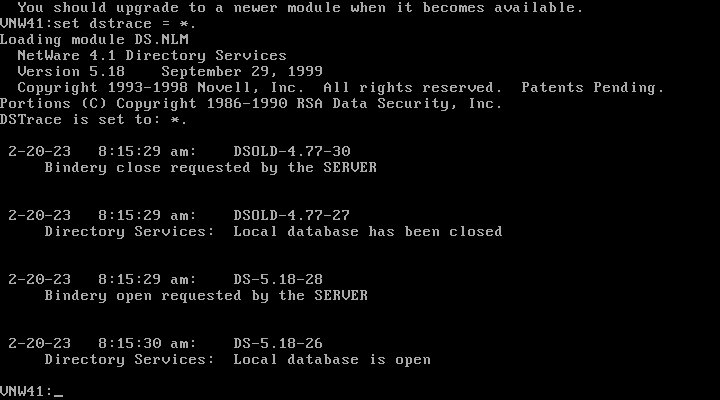
Lastly, at the server console run SET DSTRACE = *. to reload NDS without having to down the server.
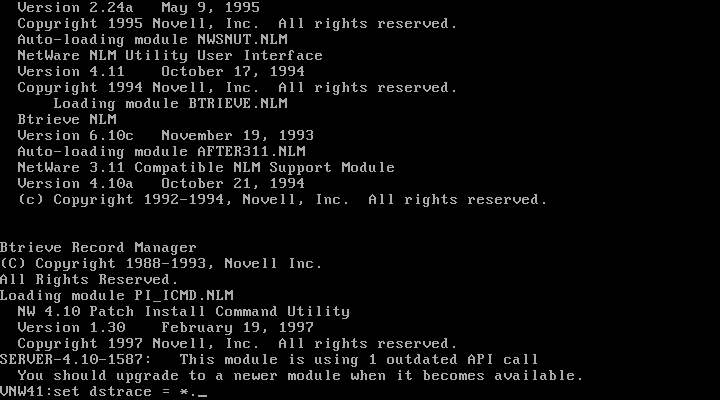
NDS Upgraded to the latest version (for NetWare 4.1)!
You can now delete the files you extracted to prepare the directory for the next patch.
STRTL8A: SPXS Update
| Date | Download | Readme | Notes |
| 1999-12-30 | STRTL8A.EXE | Readme | SPXS Update |
Copy STRTL8A.EXE to a folder and run it to extract the files typing 'y' and hitting enter at the prompt
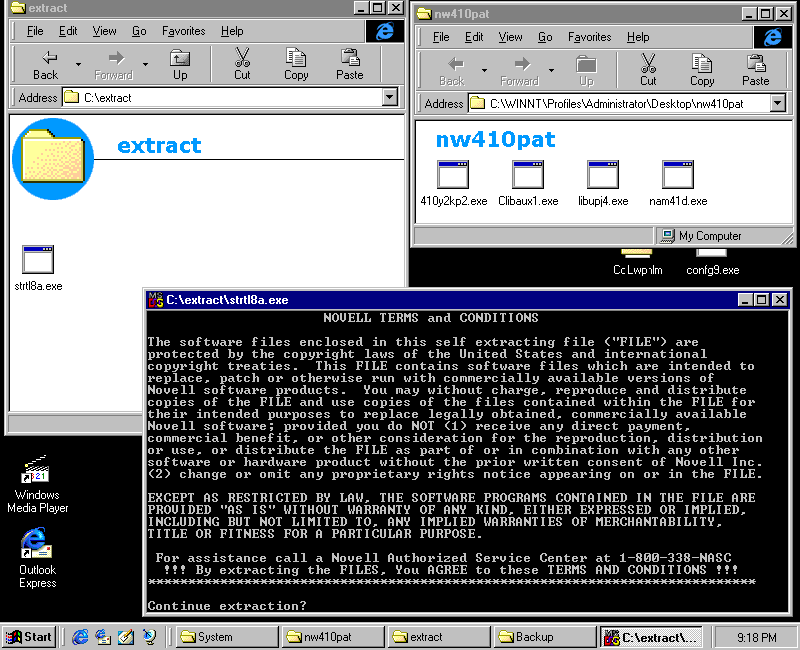
Backup the following files in SYS:\SYSTEM (if they exist) by renaming them to the .OLD extension: IPXS.NLM,
SPXS.NLM, SPXWDOG.NLM, STREAMS.NLM, TLI.NLM, as well as SYS:\SYSTEM\NLS\4\SPXS.MSG
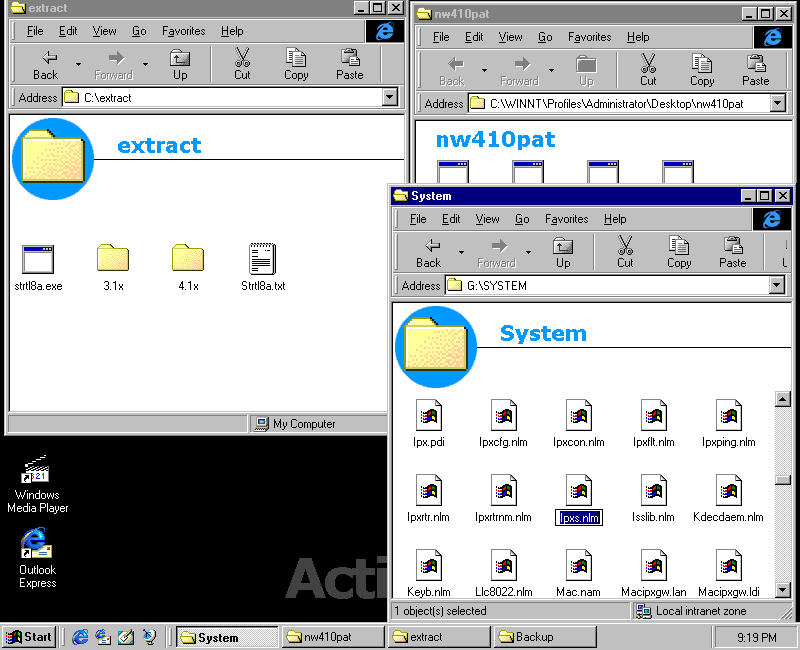
Then copy the new .NLM files from the 4.1x subdirectory over to SYS:\SYSTEM
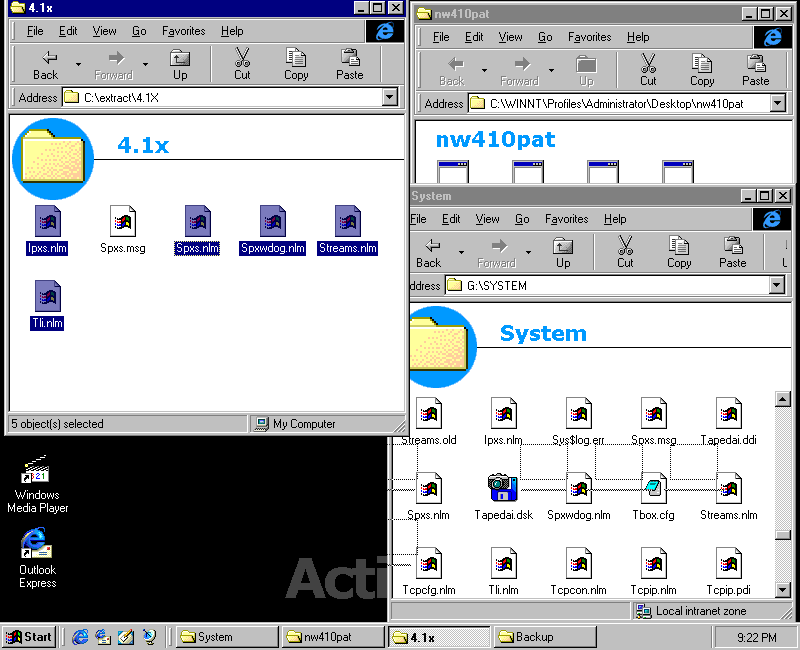
And copy the new SPXS.MSG file from the 4.1x subdirectory over to SYS:\SYSTEM\NLS\4
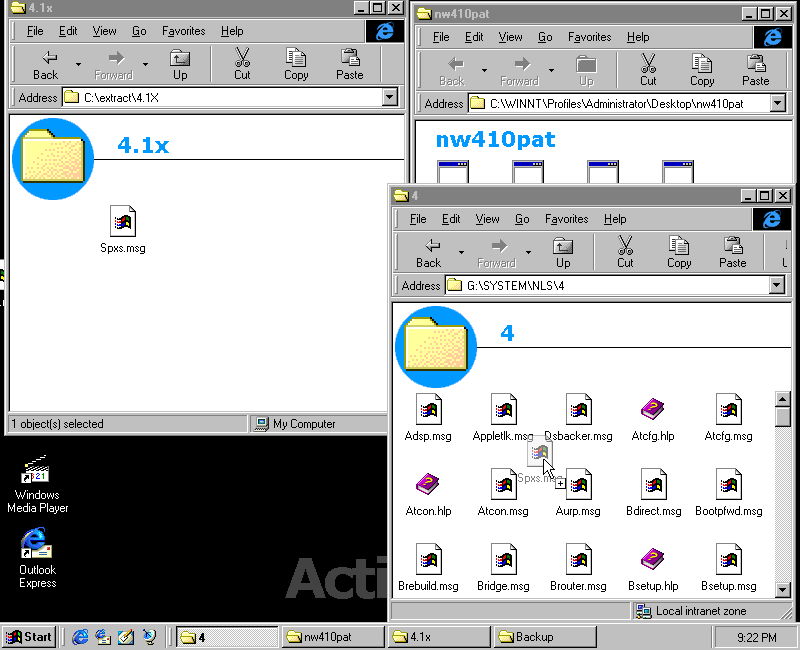
You can now delete the files you extract to prepare the directory for the next patch.
410Y2KP2: NetWare 4.10 Year 2000 Fixes
| Date | Download | Readme | Notes |
| 1999-08-25 | 410y2kp2.exe | Readme | NetWare 4.10 Year 2000 Fixes |
Copy 410Y2KP2.EXE to a folder and run it to extract the files typing 'y' and hitting enter at the prompt
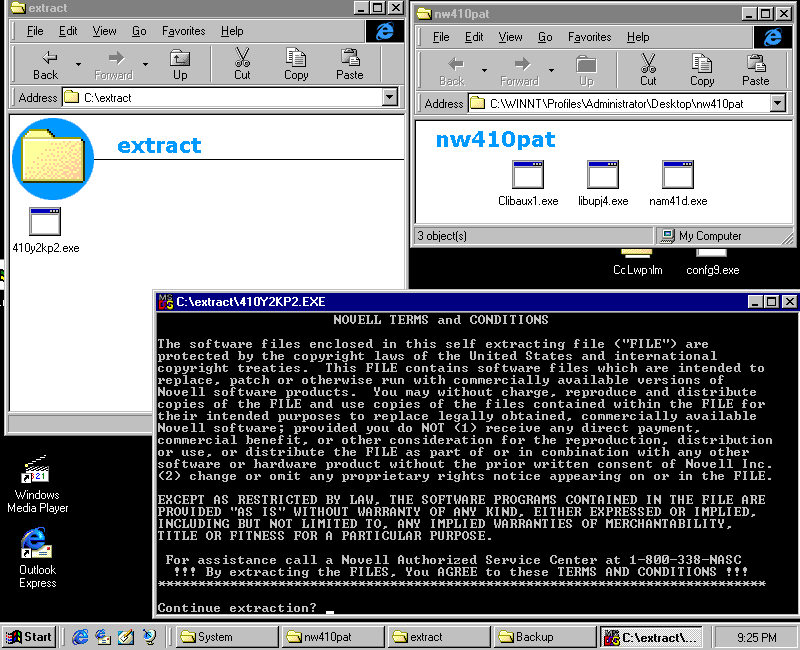
Then copy the extract files in SYS\PUBLIC (rconsole.exe and menu.ovl) to SYS:\PUBLIC replacing the existing files.
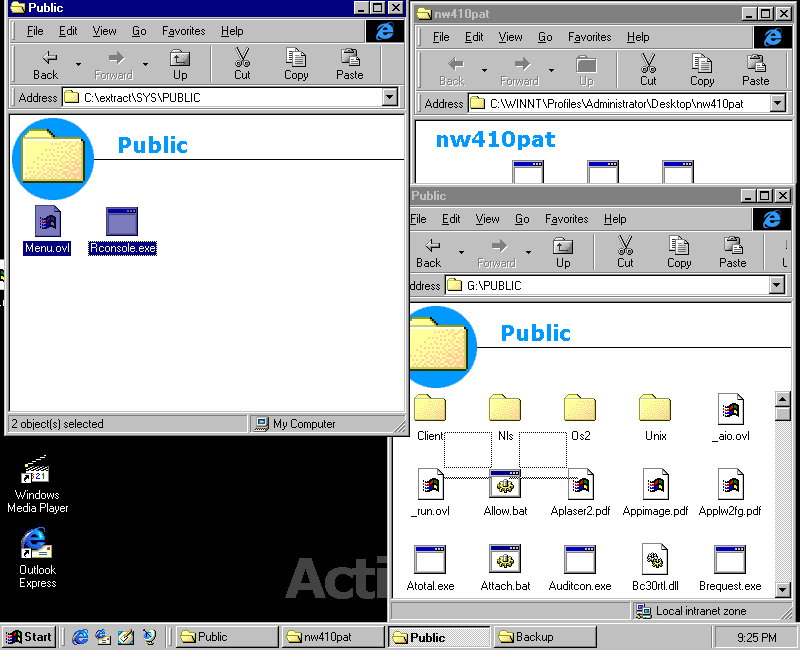
You can now delete the extracted files to prepare the directory for the next patch.
CLIBAUX1: Clibaux.nlm CLIB enhancement module
| Date | Download | Readme | Notes |
| 1999-12-08 | clibaux1.exe | Readme | Clibaux.nlm CLIB enhancement module |
Copy CLIBAUX1.EXE to a folder and run it to extract the files typing 'y' and hitting enter at the prompt
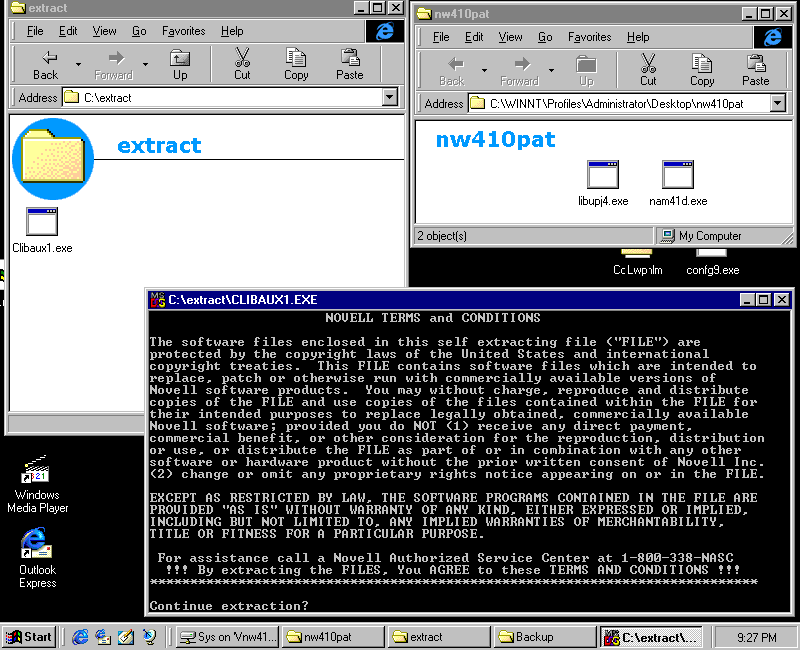
And then copy the extracted clibaux.nlm to SYS:\SYSTEM
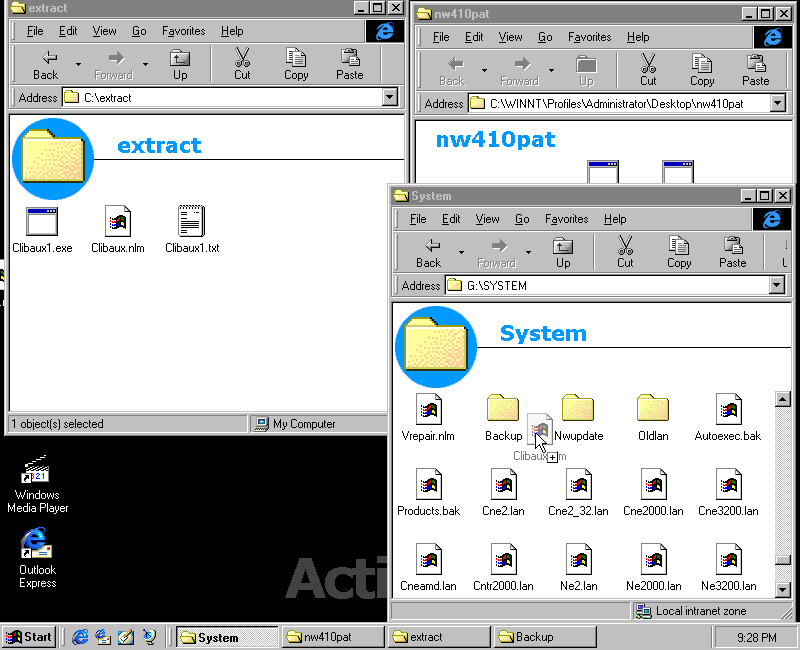
You can now delete the extracted files to prepare the directory for the next patch.
LIBUPJ4: Updated CLIB and DSAPI v4.11r libraries
| Date | Download | Readme | Notes |
| 2000-02-23 | libupj4.exe | Readme | Updated CLIB and DSAPI v4.11r libraries |
This is an update to the C library which is required to run NLMs built for newer versions NetWare like config.nlm.
Create the folder libupj4 on the SYS: volume (SYS:\LIBUPJ4), copy libupj4.exe to that folder,
and run it to extract the files typing 'y' and hitting enter at the prompt
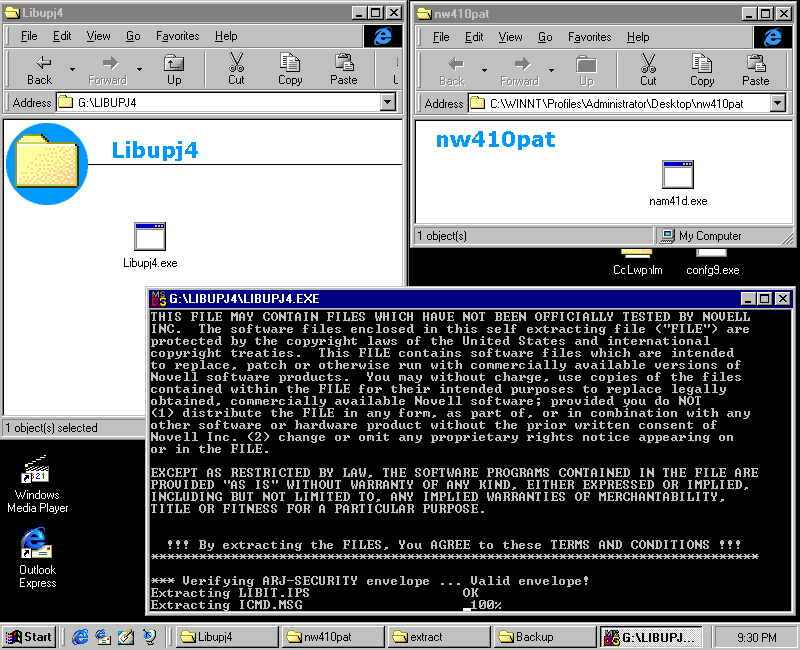
Finished extracting!
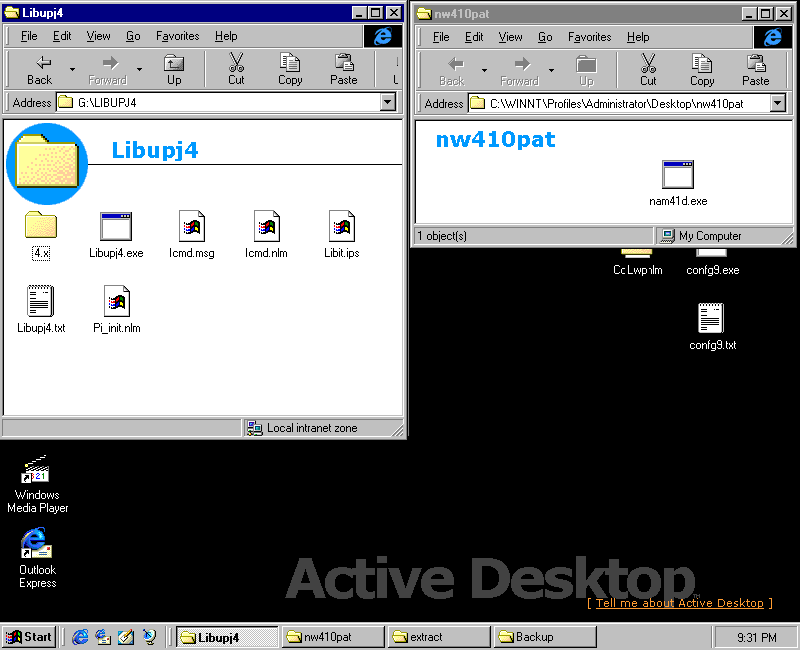
From the server console, run load install

Choose Product options

Choose Install a product not listed

Press F3 to specify a different path

Enter SYS:\LIBUPJ4\ and hit enter to continue
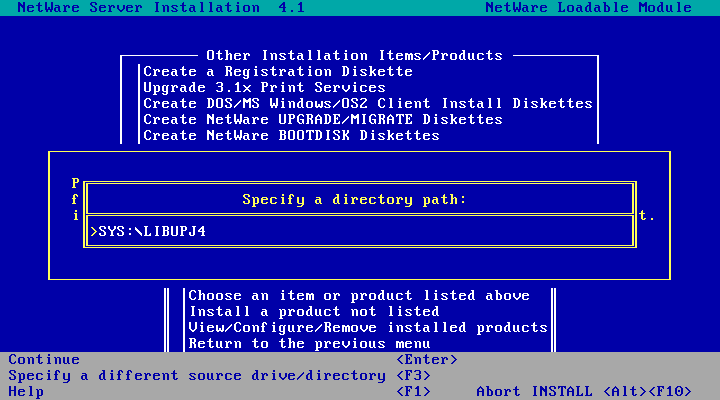
Hit F10 to accept marked groups and continue
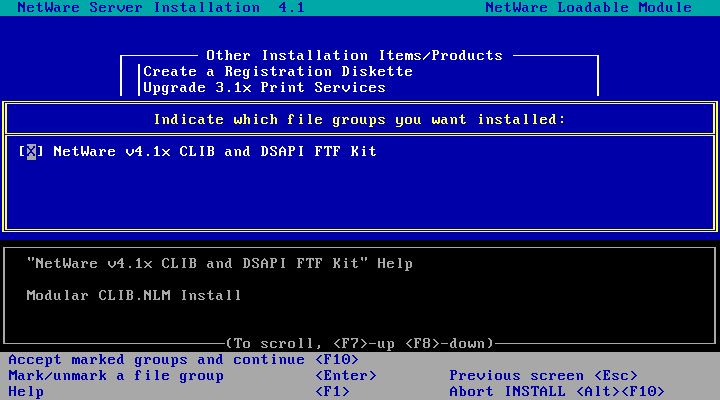
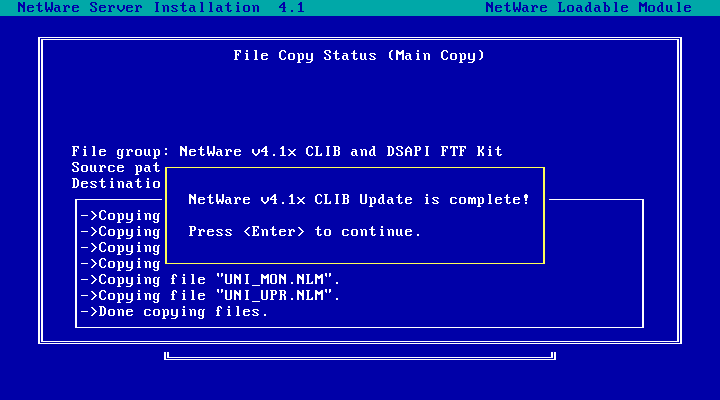
A few files are copied and then we're done! Hit enter.
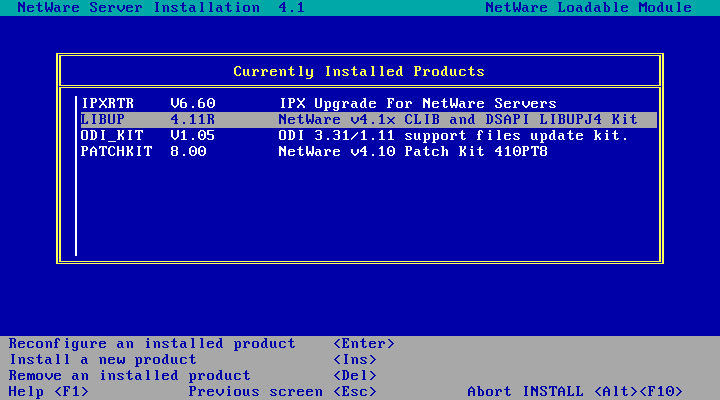
Back at the menu. Select View/Configure/Remove installed products.

And there is the CLIB update!
Hit Esc three times and choose Yes to exit INSTALL.NLM. You can now delete SYS:\LIBUPJ4
NAM41D: NAM41c.EXE; MAC.NAM, OS2.NAM for NW 4.10
| Date | Download | Readme | Notes |
| 2000-06-06 | nam41d.exe | Readme | NAM41c.EXE; MAC.NAM, OS2.NAM for NW 4.10 |
And now for the most important update: A patch to fix MAC.NAM and OS2.NAM. This one is important because you need OS2.NAM to support long filenames on Windows 9x/NT and OS/2. The updated version fixes a bunch of bugs but its incompatible with the old version. So if you were already using MAC.NAM or OS2.NAM before installing this update you're in for a world of pain.
If you've already using MAC.NAM or OS2.NAM, Novell basically recommends you backup all your files, reformat all volumes you attached MAC.NAM or OS2.NAM to, then restore all your files from backup! So you really really want to apply this update before using these namespaces! If you're in this situation, consult the readme file as there may be a slightly less painful workaround if you're willing to accept some sacrifices.
Like the NWPAUP1A update, this one involves copying file to C: and, like the previous NWPAUP1A I'll be using toolbox.nlm to do this.
Create the folder nam41d on the SYS: volume (SYS:\NAM41D), copy nam41d.exe to that folder,
and run it to extract the files
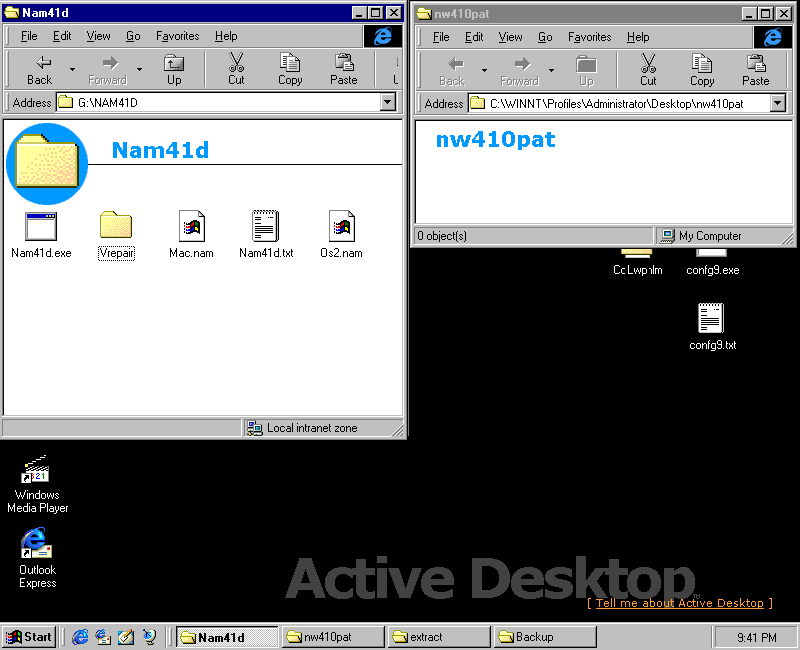
Copy the updated MAC.NAM and OS2.NAM to SYS:\SYSTEM. You may wish to backup the existing files first.
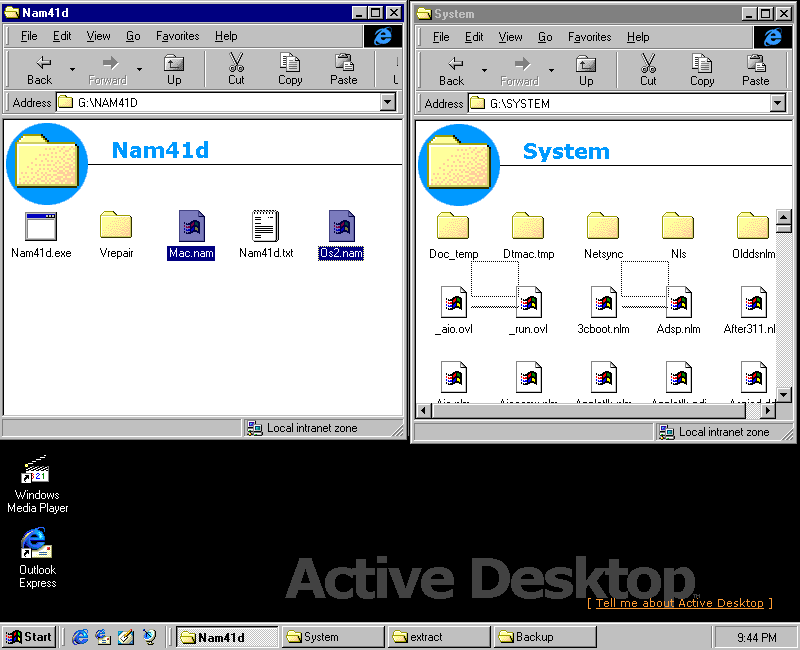
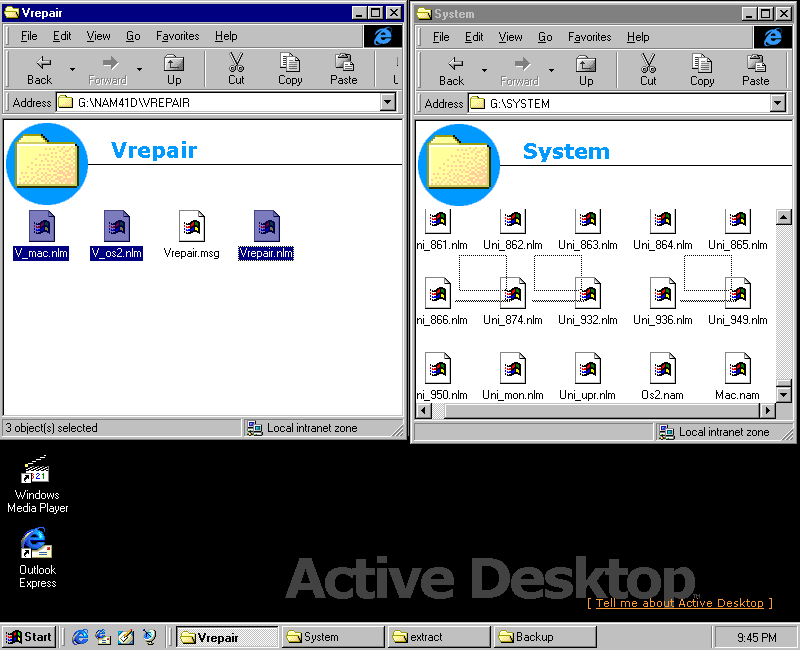
And from the VREPAIR subdirectory, copy V_MAC.NLM, V_OS2.NLM and VREPAIR.NLM to SYS:\SYSTEM. You may wish to
backup the existing files first.
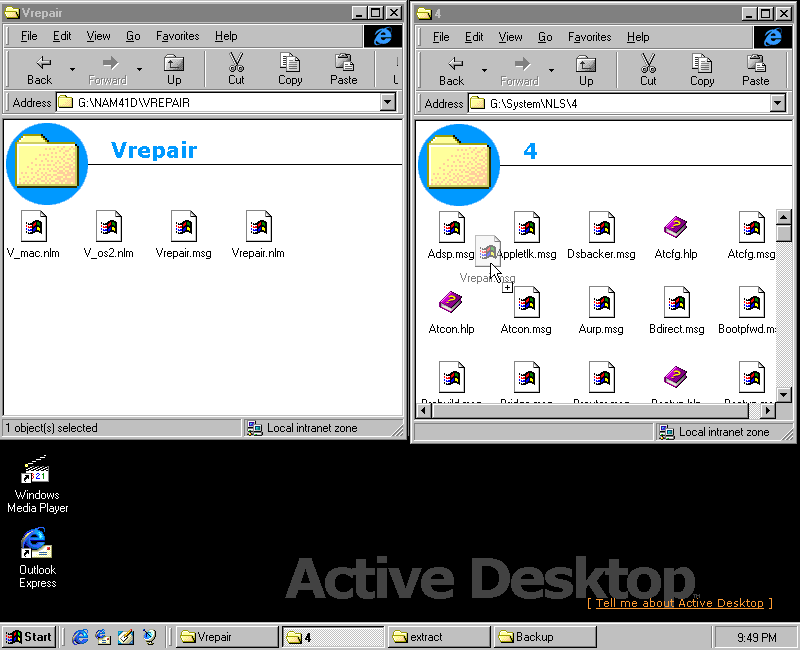
Again from the VREPAIR subdirectory, copy VREPAIR.MSG to SYS:\SYSTEM\NLS\4. You may wish to backup the existing
VREPAIR.MSG first.
At the server, run the following commands to backup existing files:
- move C:\nwsever\os2.nam C:\nwserver\os2.old
- move C:\nwsever\mac.nam C:\nwserver\mac.old
- move C:\nwsever\v_mac.nlm C:\nwserver\v_mac.old
- move C:\nwsever\v_os2.nlm C:\nwserver\v_os2.old
- move C:\nwsever\vrepair.nlm C:\nwserver\vrepair.old
- move C:\nwsever\vrepair.msg C:\nwserver\vrepairm.old
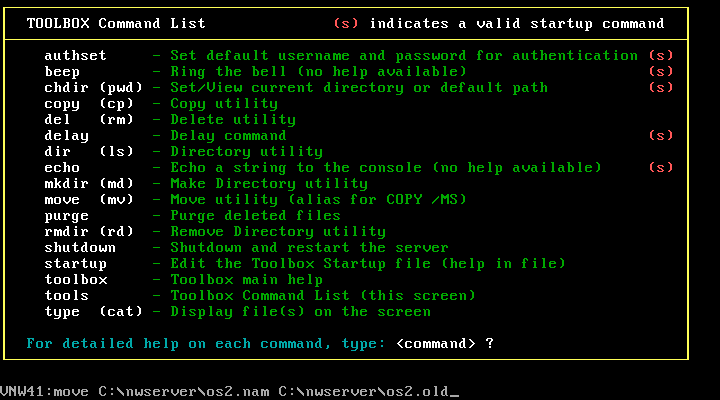
Backups done!
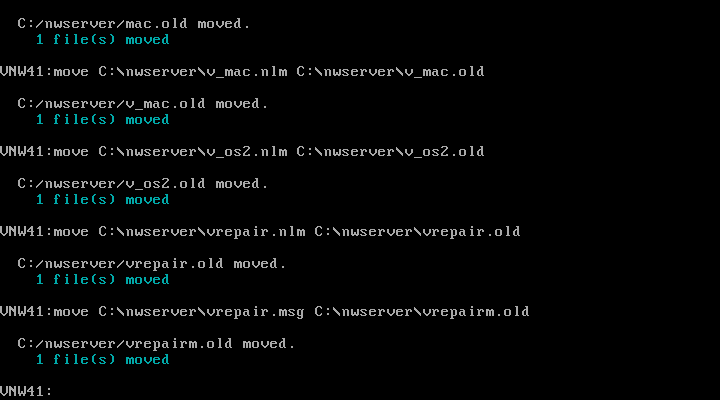
Next, run the following commands to move all the new files into place:
- move sys:\nam41d\os2.nam c:\nwserver\os2.nam
- move sys:\nam41d\mac.nam c:\nwserver\mac.nam
- move sys:\nam41d\vrepair\v_mac.nlm c:\nwserver\v_mac.nlm
- move sys:\nam41d\vrepair\v_os2.nlm c:\nwserver\v_os2.nlm
- move sys:\nam41d\vrepair\vrepair.nlm c:\nwserver\vrepair.nlm
- move sys:\nam41d\vrepair\vrepair.msg c:\nwserver\vrepair.msg
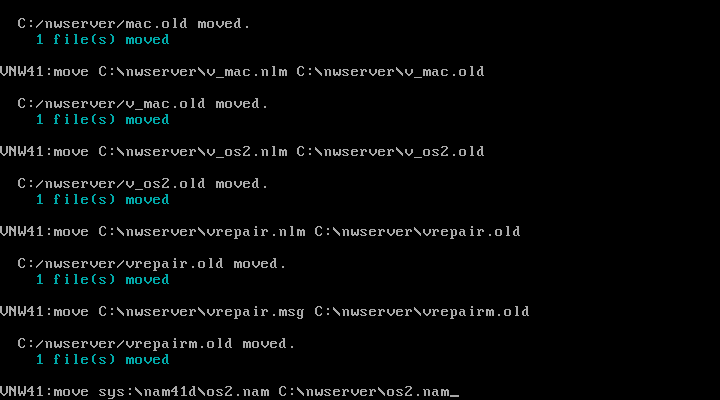
New files installed!
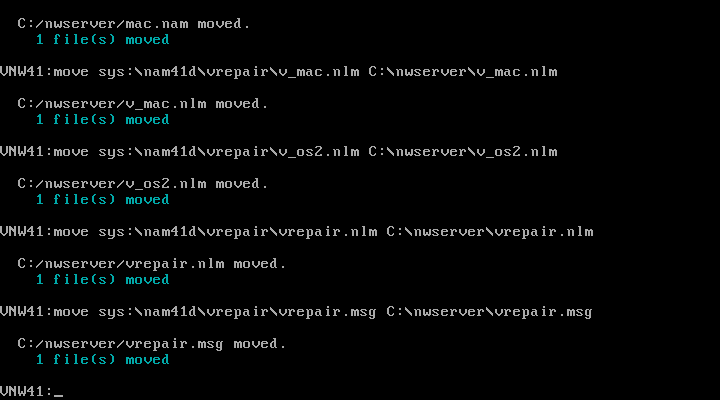
Its now safe to use the OS/2 and Mac namespaces! You can also now delete SYS:\NAM41D. You'll probably also want to reboot the server after installing all of these patches.
Final Check: Config Reader.
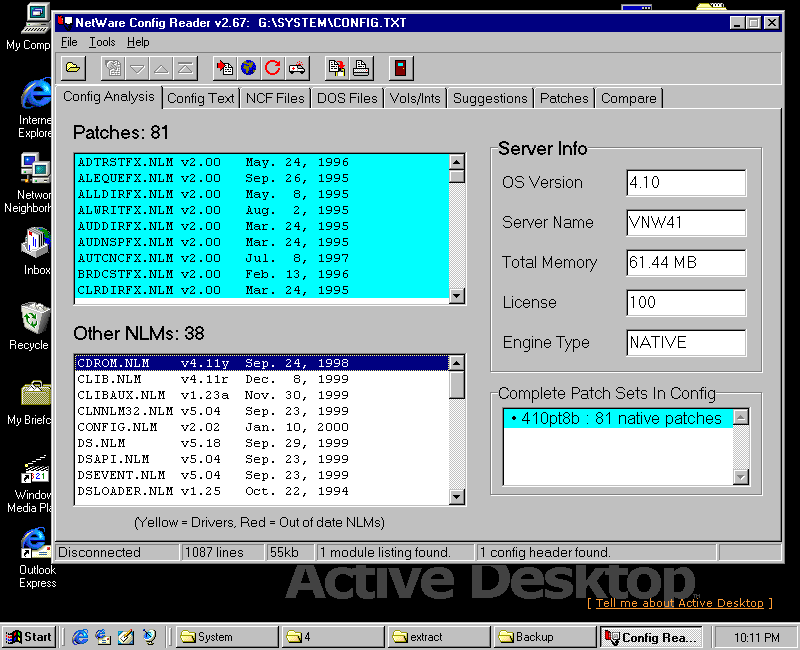
That was a lot of patching! Now to do a final check using Config Reader to see if we've missed anything. This is entirely optional as the above patches really should be enough for most situations.
You can grab config9.exe, extract it and copy config.nlm to SYS:\SYSTEM if you
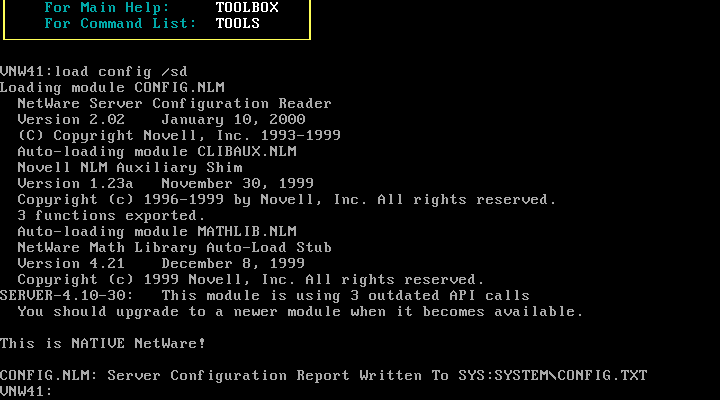
Run config.nlm: load config /sd
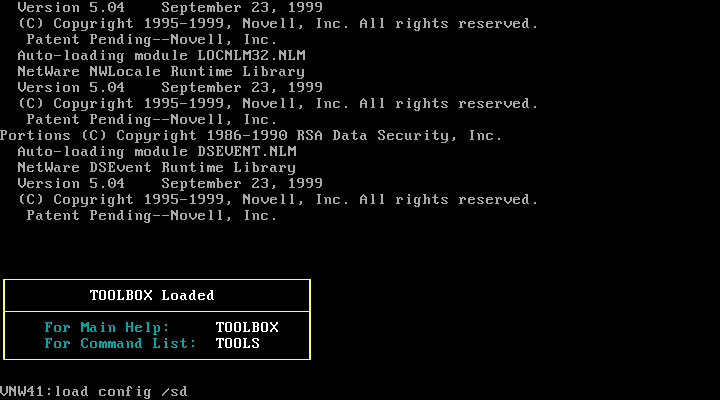
Config.nlm succeeded and generated SYS:\SYSTEM\CONFIG.TXT
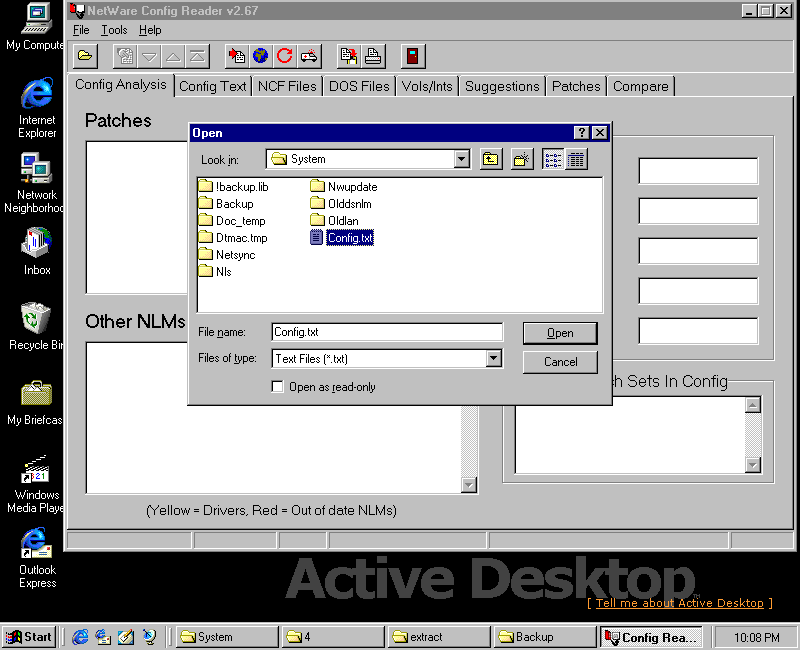
Run Config reader and open the generated CONFIG.TXT
And its not showing any out-of-date NLMs
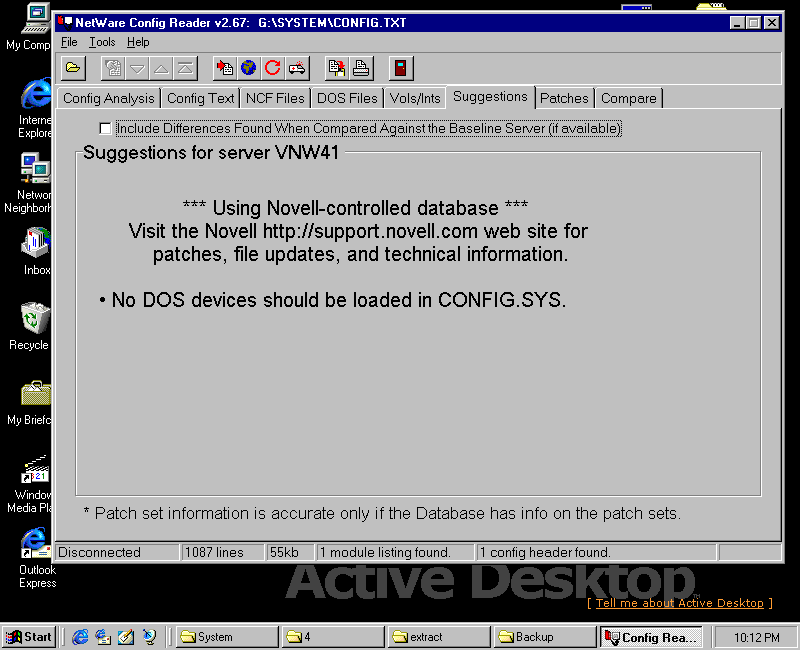
Its only suggestion is we don't load any DOS devices - its likely complaining about the DOS CD-ROM driver.
Back to NetWare 4.10 on KVM/QEMU Next Steps
Disclaimer & Comments
I'm not a netware expert, don't have any of those fancy novell certifications and have never administred a netware network; I've just played with it at home occasionally since 2004 or so. Email me if you've got any suggestions or corrections for this page or any extra information you think is worth including here. My address is david at this websites domain name (without the www bit of course).